History of the Royal Australian Navy
2008/9 Schools Wikipedia Selection. Related subjects: Military History and War
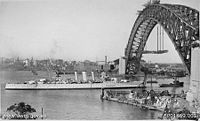
The History of the Royal Australian Navy can be traced back to 1788 and the colonisation of Australia by the British. During the period until 1859, vessels of the Royal Navy made frequent trips to the new colonies. In 1859, the Australia Squadron was formed as a separate squadron and remained in Australia until 1913. During the period before Federation, each of the six Australian colonies operated their own colonial naval force; these amalgamated in 1901 as the Commonwealth Naval Force. The Royal Australian Navy (RAN) was established in 1911, and in 1913 the fleet steamed through Sydney Heads for the first time.
The Royal Australian Navy has seen action in every ocean of the world during its short life. The RAN first saw action in World War I, and distinguished itself in three oceans. Between the wars the RANs fortunes shifted with the financial situation of Australia: experiencing great growth during the 1920s, but forced to shrink in the 1930s. Entering World War II the RAN was not in the situation it was in 1914. During the war the size of the RAN grew to over 300 vessels of virtually all classes. After World War II the RAN saw action in Korea, Vietnam, and other smaller conflicts. Today the RAN fields a small but modern force, widely regarded as one of the most powerful forces in the Asia Pacific Region.
Pre-Federation navies
From the colonisation of Australia in 1788 until 1859 the blue water defence of Australia was provided by detached units of the Royal Navy's East Asia Squadron based in Sydney. In 1859 Australia was established as a separate Royal Navy squadron; this marked the first occasion the Royal Navy ships had been permanently stationed in Australia. The Royal Navy's Australia Squadron remained the primary naval force in Australian waters until 1913 when the Royal Navy's Australia Station ceased and responsibility handed over to the Royal Australian Navy and its Sydney based depots, dockyards and structures were gifted to the Australian commonwealth.
Prior to Federation five of the six self-governing colony in Australia operated their own Colonial navies. Western Australia did not have a Colonial Naval force. The colonial navies were expanded greatly in the mid-1880s and usually consisted of gunboats and torpedo-boats for coastal defence of harbours and rivers, and naval brigades to man vessels and forts. In 1856 Victoria received its own Naval Vessel, the HMCSS Victoria, which in 1861 was deployed to assist the New Zealand colonial government during the first Taranaki Maori war. When Victoria returned to Australia the vessel had suffered one fatality and taken part in several minor actions. The deployment of Victoria to New Zealand marked the first occasion that an Australian warship had been deployed overseas. In the years leading up to Federation Colonial Victoria, became the most powerful of all the colonial navies. Victoria had HMVS Cerberus since 1870, as well as HMVSNelson, 3 small gunboats and 5 TBs. NSW had 2 very small TBs, and the corvette Wolverine. After Federation all colonial vessels became part of the Commonwealth Naval Force. Ref: Australian Naval Reserves by John M Wilkins RFD*
Formation
After the Federation of Australia in 1901, the Commonwealth Naval Forces was formed on 1 March 1901 by amalgamating the six separate colonial navies. The Commonwealth government, however, paid for the Royal Navy to continue providing blue water defence.
A growing number of people, among them Captain William Rooke Creswell, the director of the Commonwealth Naval Forces, demanded an autonomous Australian navy, financed and controlled by Australia. In 1909 Prime Minister Alfred Deakin and Creswell, while attending the Imperial Conference in London, sought the British Government's agreement to end the subsidy system and develop an Australian navy. The Admiralty rejected and resented the challenge, but suggested diplomatically that a small fleet of destroyers and submarines would be sufficient. Deakin was not impressed with the Admiralty and in 1908 invited the Great White Fleet to visit Australia, this fired the public enthusiasm for a modern navy and lead to the order of two 700 ton River class destroyers, a purchase that angered the British. The surge in German naval construction in 1909 lead the Admiralty to change their position on an Australian Navy. For his work Creswell's name lives on as the name of the naval base, HMAS Creswell, the site of the Royal Australian Naval College at Jervis Bay.
The first Australian warship, the destroyer HMAS Parramatta, was launched at Govan in Scotland on Wednesday 9 February 1910. Sister ship HMAS Yarra, was launched at Dumbarton in Scotland on Saturday 9 April 1910. Both ships were commissioned into the Royal Navy on Monday 19 September 1910 and sailed for Australia. They arrived at Port Phillip on Saturday December 10, 1910, an event that was marred by the death of Engineer Lieutenant W. Robertson, RN. Robertson suffered a heart attack 8 miles (13 km) outside Port Phillip Heads whilst onboard HMAS Yarra, and drowned.
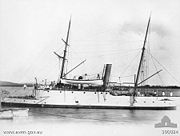
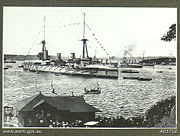
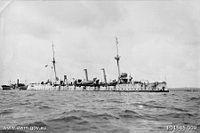
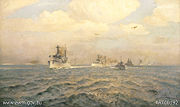
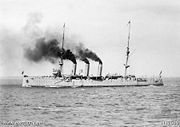
On 10 July 1911 King George V fixed his signature to the approval for the Royal Australian Navy and the ships now officially received the prefix "His Majesty's Australian Ship" (HMAS). The manpower of the fleet stood at four hundred officers and men and, for the next two years, ships were built for the fledgling navy. On Saturday 4 October 1913 the first Fleet Review of the Royal Australian Navy took place, the battle cruiser HMAS Australia, the cruisers HMAS Melbourne and HMAS Sydney, the protected cruiser HMAS Encounter and the torpedo-boat destroyers Parramatta, Yarra and Warrego, entered Sydney Harbour.
During the Imperial Conference of 1911 it was decided that in the event of war the ships of the RAN would be transferred to British Admiralty control. Under the Naval Defence Act (1912) the power to make the transfer was conferred in the Governor General. The RAN would become the Australia Squadron of the Royal Navy with all ships and personnel under the direct control of the Admiralty, while the RAN remained responsible for the upkeep of the ships and training.
World War I
On 3 August 1914,as the prospect of war with the German Empire loomed, the Australian Government sent the following message to the Admiralty.
| “ | In the event of war Government prepared place vessels of Australian Navy under control British Admiralty when desired. | ” |
On the August 8, the British Government telegrammed the Australian Government saying that the Admiralty would be grateful if the transfer be made immediately if not already done. On August 10, the Governor General officially transferred control of the RAN to the Admiralty. The Admiralty returned control of the RAN to the Australian Government on 19 August 1919 the following day, the United Kingdom declared war, bringing the whole British Empire, including Australia, into hostilities with Germany. The war was greeted with enthusiasm in Australia.
At the outbreak of war the Royal Australian Navy (RAN) consisted of Australia, the light cruisers Sydney, Melbourne and Brisbane (Under Construction), the destroyers Parramatta, Yarra and Warrego and the submarines AE1 and AE2. 3 more destroyers were under construction, and a small fleet of auxiliary ships was being maintained by the RAN. The Royal Australian Navy at the start of the war was a formidable force.
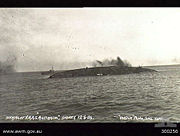
Australian Navy ships first saw action Asian and Pacific theatre assisting in the attack on German New Guinea by the Australian Naval and Military Expeditionary Force (AN&MEF). In 1884 Germany colonised the northeastern part of New Guinea and several nearby island groups. The Germans used the colony as a wireless radio base, Britain required the wireless installations to be destroyed because they were used by the German East Asia Squadron which threatened merchant shipping in the region. The objectives of the force were the German stations at Yap in the Caroline Islands, Nauru and at Rabaul, New Britain. On 30 August 1914 the AN&MEF left Sydney under the protection of HMAS Australia and HMAS Melbourne for Port Moresby where it met the Queensland contingent aboard the transport HMAHS Kanowna. The force then sailed for German New Guinea on September 7 but the Kanowna was left behind when her stokers refused to work. HMAS Sydney and some destroyers met the AN&MEF off the eastern tip of New Guinea. Melbourne was detached to destroy the wireless station on Nauru, while on September 14, Encounter bombarded a ridge near the town, while half a battalion advanced towards the town. The only major loss of the campaign was the disappearance of the Australian submarine AE1 during a patrol off Rabaul on 14 September 1914.
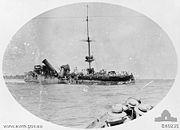
On 9 November 1914 the German light cruiser SMS Emden attacked the critical radio and telegraph station at Direction Island in the Cocos (Keeling) Islands. The inhabitants of the island managed to transmit a distress signal and Sydney, only 50 miles (80 km) away, began to steam towards the island. The Sydney reached the area in around two hours and was engaged by Emden. Sydney was the larger, faster and better armed of the two, and eventually overpowered the Emden, with the captain Karl von Müller running the ship aground on North Keeling Island to avoid sinking, at 11.15am. At first Emden refused to strike its colours, Sydney fired on the stationary Emden until it eventually struck its colours. The Battle of Cocos was the first ship-against-ship engagement for the Royal Australian Navy.
On 6 February 1915 the obsolescent light cruiser HMAS Pioneer joined the East African campaign. On July 6, it engaged the German cruiser SMS Königsberg, and German shore batteries, during the Battle of Rufiji Delta. Pioneer remained off East Africa and took part in many bombardments of German East Africa, including Dar-es-Salaam on 13 June, 1916. Pioneer then returned to Australia, to be decommissioned in October 1916.
During the Naval operations in the Dardanelles Campaign the Australian submarine AE 2 became the first Allied warship to breach the Turkish defences of the Dardanelles. AE 2 spent five days in the area and came under attack several time but was unable to find any large enemy troop transports. On 29 April 1915 she was damaged in an attack by the Turkish torpedo-boat Sultan Hisar in Artaki Bay and was scuttled by her crew. The wreck of AE 2 remained undiscovered until 2 July 1998, 83 years after she was scuttled.
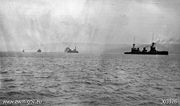
Ships of the Royal Australian Navy also assisted the Royal Navy in the blockade of the German High Seas Fleet. HMAS Australia was the flagship of the 2nd Battle Cruiser Squadron and was to take part in the Battle of Jutland. Australia was forced to miss the battle after she collided with her sister ship HMS New Zealand on 22 April 1916, Australia did not return to service until 9 June 1916. Three vessels of the Royal Australian Navy were present during the surrender of the German High Seas Fleet; HMAS Australia, Sydney and Melbourne, Australia led the 2nd Battle Cruiser Squadron during the surrender. The RAN's only two losses during the war were the submarines AE1 and AE2.
The 1918-19 influenza pandemic
Between April 1918 and May 1919 the Spanish Flu killed an estimated 25 million people worldwide, far more than had been killed in four years of war. A rigorous quarantine policy was implemented in Australia this reduced the immediate impact of the flu, but by the end of 1919 the nations death toll stood at more than 11,500.
When the pandemic struck in 1918 the ships of the Royal Australian Navy were dispersed throughout the world, the speed at which the flu spread coupled with the cramped mess decks and poorly ventilated living spaces on early 20th century warships created a favorable environment for the disease. The pandemic swept through the British Grand Fleet in 1918 and the Australian cruisers suffered high casualties, with up to 157 casualties in one ship alone. Outbreaks in the Mediterranean fleets were more severe than those in the Atlantic. HMAS Brisbane recorded 183 casualties between November and December 1918, of those casualties 2 men died of pneumonia. The RAN lost a total of 26 men to the disease. The saving factor was largely the ready availability of professional medical treatment.
South Pacific aid mission
The disease arrived in the South Pacific on the cargo vessel SS Talune which sailed from Auckland on 30 October 1918, knowingly carrying sick passengers. The Talune stopped in Fiji, Samoa, Tonga and Nauru, the first outbreaks occurred within days of the ships visits. The local authorities were generally unprepared for the size of the outbreak and the infection spread uncontrollably. The German territory of Samoa was the worst affected of the small islands, the New Zealand administration carried out no efforts to lessen the outbreak and rejected offers of assistance from nearby American Samoa. The New Zealand government officially apologised to Samoa in 2002 for their reaction to the outbreak. On 29 November 1918 the military governor of Apia requested assistance from Wellington; the request was turned down on the grounds that all doctors were needed in New Zealand. Australia offered the only alternate source of aid.
The Commonwealth Naval Board were aware of the worsening situation in the region, the sloop HMAS Fantome while stationed in Fiji reported its first case on 11 November 1918, and soon half her complement was affected. On 20 November 1918 the naval board began forming a joint relief expedition from available military medical personnel. The commanding officer of HMAS Encounter was then ordered to embark the expedition in Sydney and sail as soon as possible. Encounter departed Sydney on 24 November 1918 ten minutes after completing loading. As a precaution all 450 members of the Encounter's crew were doubly inoculated, the ship had suffered 74 cases earlier in the year at Fremantle and the captain did not want a repeat. Encounter arrived in Suva on 30 November and took half the available coal and 39 tonnes of water. Spanish flu was rampant in Suva and Captain Thring implemented a strict quarantine and placed guards on the wharf. All coaling was carried out by the crew; coaling was usually carried out by native labor. Encounter departed Suva in the evening of the same day and arrived off Apia on 3 December. Within six hours the medical landing party and their stores were ashore, Encounter departed for the Tongan capital of Nukuʻalofa immediately arriving their on 5 December. The last of the medical staff and supplies were unloaded, Encounter short on coal sailed for Suva on 7 December. On arriving in Suva Encounter received orders to return to Sydney. She reached Sydney on 17 December and was immediately placed in quarantine. The South Pacific aid mission is regarded as Australia's first overseas relief expedition and set a precedent for future relief mission conducted by the RAN.
Between the wars
Following the end of World War I the Australian Government believed that an immediate evaluation of the RAN was necessary. Australia had based its naval policy on the Henderson Recommendations of 1911 developed by Sir Reginald Henderson. The government sent an invitation to Admiral John Jellicoe, he arrived in Australia in May 1919. Jellicoe remained in Australia for 3 months and then returned to England via New Zealand and Canada. Jellicoe submitted his findings in August 1919, titled the Report on the Naval Mission to the Commonwealth. The report outlined several policies designed to strengthen British naval strength in the Pacific. The report heavily stressed a close relationship between the RAN and the Royal Navy. This would be achieved by strict adherence to the procedure and method of Administration of the Royal Navy. The report also suggested constant officer exchange between the two forces. Jellicoe also called for the creation of a large Far East Imperial Fleet which would include capital ships and aircraft carriers, this force would be mainly based in Singapore. The cost for the creation of such a fleet would be divided between Great Britain, Australia and New Zealand each contributing 75, 20 and 5% respectively. The suggested make up of the RAN would include; 1 aircraft carrier, 2 battlecruisers, 8 light cruisers, 1 flotilla leader, 12 destroyers, a destroyer depot ship, 8 submarines, 1 submarine parent ship and a small number of additional auxiliary ships. The annual cost and depreciation of the fleet was estimated to be £4,024,600. None of Jellicoe's major recommendations were carried out except for the establishment of closer ties with Britain. Although some of the minor recommendations were implemented.
With the end of World War I the Australian Government began to worry about the threat Japan posed to Australia. Japan had extended its empire 3,000 km to the south, bringing it right to Australia's doorstep. Japan had continued to build up its naval force and had reached a stage where it outgunned the Royal Navy in the Pacific. The RAN and the government believed that the possibility of a Japanese invasion was highly likely. In his report, Admiral Jellicoe believed that the threat of a Japanese invasion of Australia would remain as long as the White Australia Policy remained in place. Due to the perceived threat and bilateral support in Australia for the White Australia Policy the Australian Government became a vocal supporter of the continuance of the 1902 Anglo-Japanese Alliance. Australia was joined in its support for the alliance by New Zealand but was heavily opposed by Canada, Canada believed the alliance hindered the Empires relationship with China and the United States. No decision on the alliance as agreed on. The discussion was shelved pending the outcome of the Washington Naval Treaty. The results of the treaty which allowed the British to retain naval supremacy in the Pacific created a sense of security in Australia. Many Australian saw the Four Powers Pact as replacing the Anglo-Japanese Alliance. This sense of security became known as the Ten Year Rule. This lead to defence retrenchments in Australia following the international trend and a £500,000 reduction in expenditure. The Governor General Henry Forster when opening parliament on 22 June 1922 was quoted as saying.
| “ | In view of the result of attained at the Washington Treaty which, my advisors believe, guarantee peace in the Pacific for some time to come, it is proposed to reduce the establishment of the navy and army, and postpone the expansion of the air force. | ” |
Between World War I and World War II the Royal Australian Navy suffered a severe reduction in men and ships. As a result of the Washington Naval Treaty the flagship HMAS Australia was scrapped with her main armaments and sunk outside Sydney Heads in 1924. In the same year, the RAN began a five year program of obtaining new ships from Britain - the heavy cruisers HMAS Australia and HMAS Canberra and the seaplane carrier HMAS Albatross. This purchase was partly paid for by scrapping HMAS Brisbane, Melbourne and Sydney along with most of the destroyers. The Great Depression of 1929 hit the RAN hard and led to another reduction of manpower, the RAN although reduced in size had no problem filling its ranks, many men were unemployed and the pay was quite high for the period. Strength of the RAN fell to 3117 personnel plus 131 members of the Naval Auxiliary Services. In 1932 the strength of the Reserves stood at 5446. In the early 1930s, lack of funds forced the transfer of the Royal Australian Naval College from Jervis Bay to Flinders Naval Depot in Victoria. In 1933 the Australian Government ordered 3 light cruisers; HMAS Perth, Hobart and Sydney, and sold the seaplane carrier to fund Hobart. During this time the RAN also purchased destroyers of the V and W destroyer classes, the ships that would come to be know as the Scrap Iron Flotilla. With the ever increasing threat of Germany and Japan in the late 1930s the RAN was not in the position it was at the outbreak of World War I.
World War II
Australia declared war on Nazi Germany one hour after the United Kingdom's declaration of war on 3 September 1939. At the onset of war, the Royal Australian Navy numbered two heavy cruisers, HMAS Australian and Canberra both carried 8-inch (203 mm) guns and had entered service in the 1920s - three modern light cruisers HMAS Hobart, Perth and Sydney, which mounted 6-inch (152 mm) guns. The older cruiser HMAS Adelaide also remained in service. The RAN also possessed 4 sloops, HMAS Parramatta, Swan, Warrego and Yarra, though only Swan and Yarra were commissioned. The RAN's destroyer force consisted of five obsolete V class destroyers. The RAN also featured a variety of support and ancillary craft. Men and vessels of the RAN served in every theatre of operations, from the tropical Pacific to the frigid Russian convoys. By the end of the war the RAN's combat strength numbered 150 ships with an additional 200 auxiliary craft. The RAN reached its peak in June 1945 when it ranks swelled to 39,650. During the war the RAN lost 19 ships and 2,176 men and women died while serving in the RAN, 1,740 of them on ships of the RAN.
The following table illustrates the growth of the RAN between the outbreak of war and 30 June 1945:
| Ship type | Sept. 1939 | June 1945 |
| Heavy cruisers | 2 | 2 |
| Light cruisers | 4 | 2 |
| Destroyers | 5 | 11 |
| Frigates | 0 | 6 |
| Sloops | 2 | 2 |
| Corvettes | 0 | 53 |
| Landing ship infantry | 0 | 3 |
| Anti-submarine auxiliaries | 0 | 3 |
| Auxiliary Minesweepers | 0 | 6 |
| Minelayers | 0 | 1 |
| Fleet Oilers | 0 | 1 |
| Store ships | 0 | 12 |
| Repair ships | 0 | 3 |
| Boom defence vessels | 0 | 4 |
| Boom gate vessels | 0 | 6 |
| Tugs | 0(?) | 6 |
| Cable repair ships | 0 | 2 |
| Survey ships | 0(?) | 9 |
| Motor Launches | 0 | 33 |
| Harbour defence launches | 0 | 28 |
| Air sea rescue vessels | 0 | 20 |
| Naval auxiliary patrol vessels | 0 | 75 |
| Services reconnaissance | 0 | 8 |
| Miscellaneous vessels | 0(?) | 41 |
| Total | 13(?) | 337 |
Operations against Italy, Vichy France and Germany
From Mid-1940, ships of the RAN, at the request of the Admiralty, began to deploy to the Mediterranean Sea to take part in the Battle of the Mediterranean against Nazi Germany and Fascist Italy. In September 1939 the Admiralty and the Australian Commonwealth Naval Board agreed to deploy RAN destroyer force outside the Australia Station, the 5 ships later to be immortalised as the Scrap Iron Flotilla arrived at Malta mid December and became known as the 10th Destroyer Flotilla. HMAS Sydney deployed in May 1940 and was later joined by Hobart. When Italy declared war on 10 June 1940 the Australian warships made up 5 of the 22 destroyers and 1 of the 5 modern light cruisers on station in the Mediterranean. The RAN then offered the services of Australia to the Admiralty, the offer was gratefully accepted. When Australia arrived in the Mediterranean, the RAN has sent nearly the entire combat fleet to the Northern Hemisphere, leaving Australian open to possible attack.
On 27 June 1940 Admiral Cunningham commander of the Mediterranean Fleet ordered the 7th Cruiser Squadron, which included HMAS Sydney, to rendezvous with an Egypt-bound convoy near Cape Matapan. The cruiser squadron sighted three Italian cruisers at 6 pm on 28 June 1940 and immediately engaged them. Within an hour the Italian cruiser Espero was incapacitated and Sydney was signaled to sink her. As Sydney approached the Espero launched torpedoes, but failed to hit any targets. Sydney fired four salvos, scoring 10 direct hits on the Espero. Sydney remained at the scene for two hours picking up survivors.
On 7 July 1940, a 25 ship fleet departed Alexandria intending to meet a convoy east of Malta. The next day a submarine reported sighting a Italian fleet 500 miles (800 km) away; the fleet altered course to intercept. The two fleets sighted each other at 3 pm on 9 July 1940 and a battle that became known as the Battle of Calabria began. Four vessels of the RAN took part in the battle; HMAS Sydney, Stuart, Vampire and Voyager. Sydney was the first RAN vessels to engage the enemy, and at 3.23 pm opened fire. The Italian fleet began to withdraw, the Allied destroyer squadron was ordered forward. HMAS Stuart, leading the destroyer force, was the first to open fire; her opening salvo was fired at a range of 12,600 yards (11,500 m) and was recorded as a direct hit. The Italian fleet retired under smoke and the Allied fleet retired. The fleet remained under constant air attack and Sydney, which came under heavy air attack, was believed to have sunk. The fleet arrived back in Alexandria on 13 July.
On 17 July 1940, HMAS Sydney was ordered to support a Royal Navy destroyer squadron on a sweep north of the island of Crete. At 7.20 am on 19 July the Italian cruiser were sighted off Cape Spada by the destroyers, Sydney, 40 miles (60 km) away, began to steam towards the enemy destroyers at over 30 knots (60 km/h). Sydney sighted the cruisers at 8.29 am. By that time Sydney had achieved a speed of 37 knots (69 km/h), she fired the first shots of the Battle of Cape Spada, at a range of 17,360 metres. The Italian cruisers began to retire from the area under a smokescreen, with Sydney and the destroyers in pursuit. Sydney scored her first direct hit on the Giovanni dalle Bande Nere at 8.35 am and at the same time began to score repeated hits on the Bartolomeo Colleoni which by 9.25 am was incapacitated. Captain John Collins ordered the destroyers to sink the Colleoni. After he had maintained radio silence for two hours, Collins sent the following message.
| “ | One cruiser sunk. Ammunition practically gone | ” |
By 10.27 am, Collins decided to end the chase, largely due to the fact that the Sydney was almost out of ammunition. Sydney though hit several times during the battle she suffered no casualties, but casualties were suffered in subsequent air attacks.
On 27 March 1941 an Allied fleet under Admiral Andrew Cunningham was ambushed by an Italian naval force off Cape Matapan, Greece. Three vessels of the RAN took part in the battle; HMAS Perth, Stuart and Vampire. The victory at Cape Matapan allowed the evacuation of thousands of Allied troops from Crete.
West Africa
On 6 September 1940 HMAS Australia was ordered to sail to Freetown, Sierra Leone to join Operation Menace, the invasion of Vichy French-controlled Dakar, French West Africa. On 19 September, Australia and the RN cruiser HMS Cumberland sighted three Vichy cruisers heading south and shadowed them. When one of them, the Gloire, developed engine trouble, Australia escorted her towards Casablanca and returned to the fleet two days later. On 23 September Australia came under heavy fire from shore batteries and then drove two Vichy destroyers back into port. Australia then engaged and sunk the destroyer L'Audacieux with eight salvos in sixteen minutes. Over the next two days French and Allied forces exchanged fire; the Australia was struck twice and lost her Walrus amphibian. Australia and the rest of the fleet retired on 25 September the battle became known as the Battle of Dakar.
The "Scrap-Iron Flotilla"
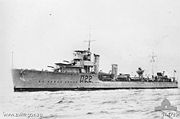
The Scrap-Iron Flotilla was an Australian destroyer group that operated in the Mediterranean and Pacific during World War II. The name Scrap-Iron Flotilla was bestowed upon the group by Nazi Propaganda Minister Joseph Goebbels who described the fleet as a "consignment of junk" and "Australia’s Scrap-Iron Flotilla". The flotilla consisted of five vessels; Scott class destroyer HMAS Stuart which acted as flotilla leader, and four V class destroyers; Vampire, Vendetta, Voyager and Waterhen. The ships were all built to fight in World War I and were slow and poorly armed compared to newer ships. The five destroyers which made up Australia's total destroyer force departed Australia in November 1939 destined for Singapore where they carried out anti-submarine exercises with the Royal Navy submarine HMS Rover. On 13 November 1939 the flotilla sailed left Singapore for the Mediterranean following a request from the Admiralty for assistance. For a time the five Australian destroyers made up the entire Mediterranean Fleet destroyer force.
The Australian destroyer flotilla took part in multiple actions while in the Mediterranean, including the evacuation of Greece in April 1941, though the flotilla came to fame in the mission to resupply the besieged city of Tobruk. The resupply routes from Alexandria and Mersa Matruh to Tobruk became known as "Bomb Alley" and was subject to constant Axis air attacks. The flotilla, which by this time was in poor condition, managed to make 138 runs to Tobruk, carrying in ammunition and stores and taking out wounded soldiers. On 28 May 1941 Vampire became the first of the flotilla to leave the Mediterranean, Vendetta the last to leave sailed in October 1941.
Of the five destroyers, three were lost during the war; Waterhen was sunk in the Mediterranean on 30 June 1941, Vampire was sunk by Japanese aircraft during the Indian Ocean Raid and Voyager ran aground at Betano, during the Timor campaign and was abandoned.
Red Sea
As well as serving in the Mediterranean Sea, ships of the RAN also served in the Red Sea. In August 1940, Italian forces invaded British Somaliland. After a fighting withdrawal, the small British garrison was evacuated from Berbera, with HMAS Hobart assisting in the destruction of the port and its facilities. To aid in the delaying action, Hobart sent a 3-pounder gun ashore, manned by volunteers from the crew. The seamen were captured by the Italians (but were liberated months later). Two RAN sloops joined the Red Sea force in 1940: Parramatta on 30 July and Yarra in September. In October, Yarra engaged two Italian destroyers attempting to raid a convoy; Yarra drove the destroyers off, saving the convoy. Though vessels of the RAN served in the Red Sea throughout the war, after 1941 larger vessels were deployed to Australian waters in response to the threat from Japan.
Loss of HMAS Sydney
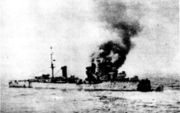
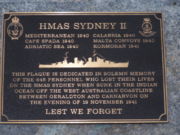
On November 19, 1941, the Australian light cruiser HMAS Sydney and the German auxiliary cruiser HSK Kormoran engaged each other in the Indian Ocean, off Western Australia. The two ships sank each other and the Sydney was lost with all 645 hands. The majority of the Kormoran's crew were rescued and became prisoners of war. The location of both wreaks reamined a mystery to many and subject to much controversy until March 16–17 2008 when both ships were found.
Sicily 1943
During early 1943, eight Australian-designed and built Bathurst class corvettes were transferred to Egypt from the Indian Ocean, in preparation for Operation Husky, the Allied invasion of Sicily. They were part of a 3,000 ship Allied force. The corvettes arrived in the Mediterranean in May and were formed into the 21st Minesweeping Flotilla and the 22nd Minesweeping Flotilla. All survived the campaign without damage or casualties sustained in action, although HMAS Maryborough experienced a near miss from a German bomber. When the captain of HMAS Gawler enquired what damage had been sustained, the response from Maryborough read: "no damage except to my underpants".
War with Japan
After the Imperial Japanese Navy's attacks on the Allies in December 1941, the RAN redeployed its larger ships to home waters to protect the Australian mainland from Japanese attack, while several small ships remained in the Mediterranean. From 1940 onwards there was considerable Axis naval activity in Australian waters first from German commerce raiders and submarines and later by the Imperial Japanese Navy.
Initially RAN ships served as part of the British-Australian component of the American-British-Dutch-Australian Command (ADBACOM) naval forces. ABDACOM was wound up following the fall of the Netherlands East Indies. It was succeeded by the South West Pacific Area (command) (SWPA). The United States Seventh Fleet was formed at Brisbane on March 15, 1943, for service in the SWPA. RAN ships in the Pacific generally served at part of Seventh Fleet task forces.
Timor
From February 1942, the RAN played a critical role in resupplying Australian and Dutch commandos on Timor. Voyager was not the only loss during the campaign. On 1 December 1942, HMAS Armidale was attacked by thirteen Japanese aircraft while attempting to land Dutch soldiers off Betano, Portuguese Timor. Armidale sank with the loss of 40 of her crew and 60 Dutch personnel. During the engagement, Ordinary Seaman Teddy Sheean manned an Oerlikon anti-aircraft gun and was wounded by strafing Japanese planes, he went down with the ship, still strapped into the gun and still shooting at the attacking aircraft.
Java Sea
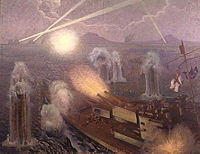
On February 28, 1942, a joint ABDA naval force met a Japanese invasion force in the Java Sea. The Leander class cruiser, HMAS Perth and the American heavy cruiser USS Houston survived the Battle of the Java Sea.
On 1 March 1942 the two ships attempted to move through the Sunda Strait to Tjilatjap. Perth and Houston found their path blocked by the main Japanese invasion fleet for western Java. After a prolonged battle, both ships were torpedoed and sank. In all, 350 crew from Perth and three civilians were killed; 324 crew members survived the sinking and were taken prisoner by the Japanese, although 106 died in captivity before the end of the war. The loss of Perth, soon after the sinking of its sister Sydney, had a major psychological effect on the Australian people.
Coral Sea
On 2 May 1942, two ships of the RAN were part of the Allied force in the Battle of the Coral Sea; HMAS Australia and HMAS Hobart. Both ships came under intense air attack, while part of a force guarding the approaches to Port Moresby.
The defence of Australian shipping
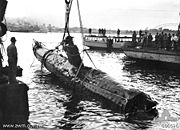
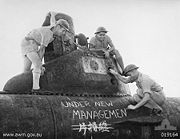
In late May and early June, 1942, a group of five Imperial Japanese Navy submarines made a series of attacks on Sydney and the nearby port of Newcastle. On the night of May 31- June 1, the submarines launched three Ko-hyoteki class midget submarines against Allied shipping in Sydney Harbour. A torpedo exploded under the depot ship HMAS Kuttabul, killing 21. On June 8, two of the submarines shelled Sydney and Newcastle, with little effect. In response to these attacks the RAN instituted convoys between Brisbane and Adelaide. All ships of over 1200 tons and with speeds of less than 12 knots (22 km/h) were required to sail in convoy when travelling between cities on the east coast.
The attack on Sydney and Newcastle marked the start of a sustained Japanese submarine campaign against Australia. During 1942 Japanese submarines sank 17 ships in Australian waters, though none of these ships were sailing as part of a convoy. 16 ships were sunk in Australian waters during 1943 before the Japanese broke the campaign off in July. Five of these ships were sunk while sailing in escorted convoys. The Australian Naval authorities gradually dismantled the coastal convoy system between December 1943 and March 1944. By the end of the war the RAAF and RAN had escorted over 1,100 convoys along the Australian coastline.
While the scale of the Japanese naval offensive directed against Australia was small compared to other naval campaigns of the war such as the Second Battle of the Atlantic these attacks were "the most comprehensive and widespread series of offensive operations ever conducted by an enemy against Australia". Although the RAN only sank a single full-sized Japanese submarine in Australian waters ( I-124 in January 1942) convoy escorts may have successfully reduced the threat to shipping in Australian waters by making it harder for Japanese submarines to carry out attacks.
Loss of HMAS Canberra
The RAN's biggest single ship loss of the war was that of the sister ship to Australia, HMAS Canberra at the Battle of Savo Island, in August 1942. In the early hours of the morning of 9 August 1942, Canberra was severely damaged off Guadalcanal in a surprise attack by a powerful Japanese naval force. Canberra was hit by 24 shells in less than two minutes and 84 of her crew were killed, including Captain Frank Getting. Following an order to abandon ship, Canberra was sunk the next day by a torpedo from a US destroyer, to prevent it being captured.
The loss of Canberra, following losses such as Sydney and Perth, attracted unprecedented international attention and sympathy for the RAN. US President Franklin D. Roosevelt wished to commemorate the loss of Canberra and requested that a U.S. heavy cruiser under construction be named Canberra. USS Canberra was launched on 19 April 1943. The British Government approved the transfer of HMS Shropshire to the RAN as a replacement, and the ship was commissioned as HMAS Shropshire on 20 April 1943.
Leyte Gulf & Lingayen Gulf
Four RAN warships, Australia, Shropshire, HMAS Arunta and HMAS Warramunga took part in the Battle of Leyte Gulf (October 23-25, 1944), arguably the largest naval battle in history. In the lead-up, on October 21, Australia became the first Allied ship to be hit by a kamikaze aircraft. near Leyte Island; gunners from HMAS Australia and HMAS Shropshire fired at, and reportedly hit, an unidentified Japanese aircraft. The plane then flew away from the ships, before turning and flying into Australia, striking the ship's superstructure above the bridge, and spewing burning fuel and debris over a large area, before falling into the sea. A 200 kg (440 pound) bomb carried by the plane failed to explode; if it had, the ship might have been effectively destroyed. At least 30 crew members died as a result of the attack, including the commanding officer, Captain Emile Dechaineux; among the wounded was Commodore John Collins, the Australian force commander. Australia remained on duty but on October 25, was hit again and was forced to retire to the New Hebrides for repairs.
Shropshire and Arunta remained at Leyte and were part of the U.S. 7th Fleet Support Force in the action at Surigao Strait on October 25. Both ships contributed to the sinking of the battleship Yamashiro.
HMAS Australia returned to combat at the Battle of Lingayen Gulf in January 1945. However, on January 5, 6, 8 and 9, the ship was again attacked by kamikazes and suffered damage which forced it to retire once more. Australia is believed not only to have experienced the first kamikaze attack but the greatest number.
Ships with British fleets 1942-45
In 1940-42, seven N- and Q-class destroyers were built in the UK and commissioned into the RAN for service with the British Eastern Fleet:
- HMAS Napier
- HMAS Nepal
- HMAS Nestor
- HMAS Nizam
- HMAS Norman
- HMAS Quiberon
- HMAS Quickmatch
These ships were predominantly crewed by RAN personnel, although they were often commanded by British officers.
Following the Japanese raid on Ceylon of March-April 1942, the Eastern Fleet was transferred from its base at Trincomalee, to the other side of the Indian Ocean: Kilindi in Kenya. From there the fleet undertook local patrols, escorted convoys and occasionally despatched ships to operations in the Mediterranean. During Operation Vigorous, a convoy to Malta in June 1942, Nestor was serious damaged in an air raid and slowly sank.
From late 1944, Nepal, Norman and Quiberon were transferred, along with many other Eastern Fleet ships, to the new British Pacific Fleet (BPF). Among other operations with the BPF, they took part in the Battle of Okinawa.
In late 1945, following the end of hostilities, the RAN acquired three more Q-class destroyers:
- HMAS Queenborough
- HMAS Quality
- HMAS Quadrant
Surrender and occupation of Japan
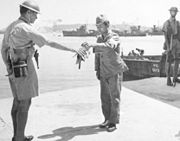
Ten RAN vessels were present at the signing of the Japanese surrender in Tokyo Bay on 2 September 1945; Ballarat, Cessnock, Gascoyne, Hobart, Ipswich, Napier, Nizam, Pirie, Shropshire and Warramunga. Following the surrender ceremony the majority of the RAN vessels left Japanese waters for other duties. As part of the surrender agreement the Japan agreed to an Allied occupation and disarmament.
On 17 August 1945 the Australian Government agreed to provide two cruisers and two destroyers for service with the British Commonwealth Occupation Force (BCOF). A total of 15 RAN ships served with the BCOF, the ships performed a variety of tasks but were mainly employed on the Kyushu Patrol, the aim of the patrol was to prevent Korean nationals illegally entering Japan.
The RAN also played a role in the disarmament of Japan, assisting in the scuttling of former Imperial Japanese Navy ships, in one instance HMAS Quiberon took part in the sinking of seven submarines of Kyushu as part of Operation Bottom. When Indian and New Zealand contingents began to withdraw from the BCOF the operation became a predominantly Australian operation. In 1948, Kure naval base was turned over to Australia, and became known as HMAS Commonwealth.
When North Korea invaded South Korea on 25 June 1950 one RAN ship was on station as part of BCOF, the Australian Government immediately offered HMAS Shoalhaven for UN service, eventually all RAN ships in the area were transferred to the command of British Commonwealth Forces Korea (BCFK).
Cold War
Following World War II, the RAN reduced its surface fleet but continued to expand in other ways, acquiring two Royal Navy Majestic class aircraft carriers then under construction ( HMS Majestic and HMS Terrible) to build up a Fleet Air Arm. In the 1960s the RAN began to move away from commissioning British designs; the last major British design used was the Type 12 frigate, which formed the basis of the River class frigates. When it was decided that the RAN should commission a destroyer armed with guided missiles, the obvious British design was the County class; however, the RAN had reservations regarding the gas turbine propulsion, the Seaslug missile system, and being able to adapt the design to Australian needs. Instead, the Australian government chose the steam turbine powered Charles F. Adams class destroyer, armed with the Tartar missile as the basis for its Perth class, the first major U.S. warship design chosen for the RAN.
By the mid-late 1960s, the RAN was at the zenith of its operational capabilities; it was capable of dispatching a full carrier battle group in support of major operations by having in service an aircraft carrier (HMAS Melbourne), three large area defence destroyers of the Perth class, six modern River class frigates and four Oberon class submarines.
With the retreat of British forces west of the Suez Canal in the 1960s, the RAN began to take a more defensive role, and in co-operation with the United States, allied though the ANZUS treaty. The RAN saw service in many of the world's post war conflicts including Korea, Vietnam, and the Indonesian Confrontation.
Korea
On 27 June 1950 the United Nations Security Council called on member nations to aid South Korea. On 29 June Prime Minister Robert Menzies announced that the frigate HMAS Shoalhaven, stationed in Japan, and the destroyer HMAS Bataan, in Hong Kong would be placed under UN command in Korea. On 1 July, one day after President Truman committed American ground forces to Korea, the first Australian operation in Korea took place; HMAS Shoalhaven moved from Japan to Pusan escorting an American ammunition ship. On 27 July 1950, the destroyer HMAS Warramunga was also deployed.
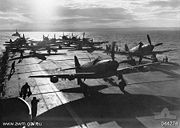
During the Landing at Wonsan in October 1950, HMAS Warramunga provided gunfire support during the landing of U.S. X Corps. During the mass evacuation of troops and refugees in the city of Hungnam in December 1950, HMA Ships Bataan and Warramunga assisted in the evacuation. In October 1951, Sydney arrived in Korean waters to replace HMS Glory for a three month tour. Sydney carried two squadron of Sea Furies - 805 Squadron RAN and 808 Squadron RAN, and 817 Squadron RAN equipped with Fireflies. Sydney returned to Japan having lost only 9 aircraft, with 3 pilots killed, and having launched over 2,700 missions from her flight deck. Later in the war, 9 ships of the RAN participated in the naval blockade of North Korea.
Malaya
The Malayan Emergency was declared on 18 June 1948 brought about by a rise in Communist guerrillas in Malaysia. Australia, as a member of the Southeast Asia Treaty Organization, first deployed troops in 1950. The first ships of the RAN to arrive in the area were the Tribal class destroyers HMAS Warramunga and Arunta in June 1955. Other ships that served in Malayan waters during the Emergency included the ships Anzac, Melbourne, Quadrant, Queenborough, Quiberon, Quickmatch, Sydney, Tobruk, Vampire, Vendetta and Voyager. During the period, ships of the RAN also served with the Far East Strategic Reserve; between 1955 and 1960 a total of 13 RAN ships served with the Strategic Reserve. Serving as part of a larger naval organisation provided valuable experience for the ships of the RAN. Seven members of the RAN died while serving during the Emergency and with the Strategic Reserve.
The decision to deploy the RAN to the area was due to the strong anti-communist feeling in Australia and the western world in the 1950s and 60s. The primary role of the RAN was to provide a deterrent to further Communist aggression in South East Asia. The secondary role was to assist in the maintenance of the security of the Federation of Malaya by participating in operations against the Communist Terrorists.
Indonesia
In response to the Indonesian invasion of Borneo and Malaya in 1963 Australia increased its presence in the region. At the outbreak of hostilities the RAN had two frigates, HMAS Yarra and HMAS Parramatta on duty in the area. As tension mounted, Australia increased its presence by sending Sydney, Vampire, Vendetta, Duchess and Derwent to the area. On May 19, 1964 the 16th Minesweeping Squadron, comprising six Ton class minesweepers, was also deployed.
On 13 December 1964, HMAS Teal was fired upon with automatic weapons by an unlit vessel whilst operating as part of the Singapore Strait patrol. The vessel was overpowered and arrested by Teal following a further small arms engagement that resulted in the deaths of three Indonesian crew members. On 23 February 1965, Teal was again involved in another engagement, she detected an unlit vessel off Cape Rachado. The suspicious vessel was closed on and illuminated, and revealed nine armed men in uniform who surrendered immediately upon challenge. HMAS Hawk became the second vessel of the 16th Minesweeping Squadron to see action when on 13 March 1966, while patrolling off Raffles Light, came under fire from an Indonesian shore battery. Eleven high explosive rounds were fired at the ship, some landing within 200 yards (200 m) of the vessel, Hawk withdrew from the area at speed. The following morning, Hawk intercepted a sampan with five Indonesians on board who were promptly arrested.
When Indonesian forces crossed the border into Sebatik Island, Sabah on 28 June 1965, HMAS Yarra was called on to carry out bombardments disrupting the withdrawal of the Indonesians. Yarra carried out two more bombardments of the border area on 5 and 10 July. During three runs, Yarra fired a total of 70 rounds on the enemy. On 13 August 1966 an agreement concluded between Indonesia and Malaysia brought an end to the conflict.
HMAS Voyager
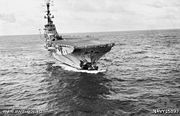
During the night of 10 February 1964 the worst peacetime disaster in the RAN's history occurred when the destroyer HMAS Voyager was cut in two by the bow of the aircraft carrier HMAS Melbourne, killing 82 of the 293 men on board Voyager.Melbourne was conducting air group exercises off Jervis Bay with Voyager acting as the rescue destroyer. Voyager's duty was to remain 1,000 yards (1,000 m) astern of Melbourne. At 9:00pm, Melbourne's commanding officer Captain John Robertson ordered a flying course and then observed Voyager move from a position fine on the starboard bow to take up her station. Unexpectedly Voyager turned into the carrier and continued on this course until a collision was unavoidable. The collision killed 81 members of Voyager's crew, including Captain D.S Stevens and one dockworker. The search for survivors went on through the night.
Following the collision Prime Minister Menzies ordered a Royal Commission under Sir John Spicer to investigate the event. Following 50 days of hearings it was found that Voyager's inability to mount a proper lookout as the primary cause for the collision, but also placed some blame on the actions of Robertson and several other bridge officers. Robertson was cleared during his court martial but left the service after being transferred to a shore posting. The decision to award some of the blame on the bridge crew of Melbourne was seen as unfair by many and public pressure began to mount on the Naval Board. The increase in public pressure and allegations that Voyager's captain had a severe drinking problem led to a second Royal Commission in 1967. The second Royal Commission sat for 85 days and completely cleared Robertson of any fault. The two commissions caused great anguish in the hierarchy of the RAN, which was not accustomed to such tight scrutiny. The Commission led to the eventual dismantling of the Naval Board's isolation from the civilian world.
After the loss of Voyager the RAN, which was becoming increasingly busy in the South East Asia region, identified the need for a speedy replacement. HMAS Duchess was loaned to the RAN from the Royal Navy on 8 May 1964.
Vietnam War
Ships of the Royal Australian Navy were stationed on continuous operational service in Vietnam between 1965 and 1972, in total 18 ships served in Vietnam waters during the war. During this period the Navy performed a wide variety of operational tasks at sea, ashore and in the air. The RAN's primary contribution consisted of destroyers, Fleet Air Arm personnel attached to a United States Army helicopter company and No. 9 Squadron RAAF, a Clearance Diving Team, and a logistic support force consisting of transport and escort ships. Other RAN personnel served ashore in medical teams or performed staff duties at the Australian Embassy in Saigon or the 1st Australian Task Force Headquarters in Nui Dat.
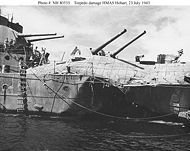
The RAN did not deploy operationally until 1965, but in 1962 HMAS Vampire and HMAS Quickmatch made goodwill visits to Saigon. They were followed a year later by similar visits by HMAS Quiberon and HMAS Queensborough. In 1967 HMAS Hobart became the first RAN destroyer to be operationally deployed to Vietnam. Hobart served three tours in Vietnam from March to September in 1967, 1968 and 1970. During her operation she fired 10,000 rounds at 1000 shore targets and came under fire around 10 times. Hobart was awarded a US Navy Unit Commendation in recognition of her service in Vietnam while her sister ship, Perth received both the US Navy Unit Commendation and the US Meritorious Unit Commendation. In their five years service in Vietnam, the four gunline destroyers; Perth, Brisbane, Hobart and Vendetta steamed over 397,000 miles and fired 102,546 rounds.
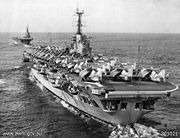
The aircraft carrier HMAS Sydney was converted for troopship duties in the early 1960s and began her first voyage to Vietnam in May 1965, transporting the 1st Battalion, Royal Australian Regiment, from Sydney to Vung Tau in southern Vietnam. Sydney became known as the Vung Tau Ferry and made 25 voyages to Vietnam carrying 16,094 troops, 5,753 deadweight tons (5,845 t) of cargo and 2,375 vehicles.
In 1969 HMAS Melbourne, while performing exercises with the United States Navy in the South China Sea, rammed and sunk another destroyer. The USS Frank E. Evans was cut in half by Melbourne. Her bow sank instantly, taking 74 of her crew down with it. Evans was stricken from the Naval Vessel Register on 1 July 1969. Again, the Melbourne's captain was cleared of any responsibility for the disaster, but he met the same fate as Melbourne's previous captain and was transferred to a shore posting. HMAS Melbourne is credited as being the only warship to ram and sink two friendly destroyers in peace time.
In April 1971 Prime Minister John Gorton announced that Australian forces in Vietnam would be reduced. This led to the withdrawal of the clearance divers in May and the Fleet Air Arm in June. The final RAN destroyer on the gunline, Brisbane, returned to Sydney on 15 October 1971. The Whitlam government withdrew all Australian forces from and stopped military aid to South Vietnam. HMAS Jeparit returned to Sydney on 11 March 1972 and was followed the next day by HMAS Sydney. During the 10 years that the RAN was involved in the war, eight officers and sailors were killed and another 46 were either wounded or suffered other injuries.
Cyclone Tracy
During the morning of 25 December 1974 Tropical Cyclone Tracy struck the city of Darwin killing 71 people and causing $4 billion of damage (1998 AUD). In response to the cyclone the RAN embarked upon the largest peacetime disaster relief operation in its history, involving 13 ships, 11 aircraft and some 3000 personnel.
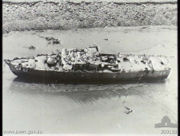
When Tracy struck Darwin the RAN had a total of 351 personnel based in the city, along with four Attack class patrol boats; the small number of men limited the capability of the RAN to render immediate assistance to the citizens of Darwin. Of the four Attack class patrol boats based in Darwin, all four were damaged in some way by the storm. HMAS Arrow sunk under Stokes Hill Wharf with the loss of two sailors, HMAS Attack was beached by the force of the winds at Doctor's Gully and HMAS Advance and HMAS Assail were slightly damaged. Land based naval installations were also heavily damaged by the cyclone, Darwin Naval Headquarters was destroyed, as was large sections of the patrol boat base and the married quarters. The oil fuel supply installation and naval communications station at HMAS Coonawarra were also damaged. The initial RAN relief which was limited to search and rescue in the area of Darwin Harbour and Melville Island was hindered by the lack of reliable communications.
As the severity of the disaster was realised, a naval task force under Rear Admiral R.E. Wells was established to render aid to the people of Darwin, the operation became known as Operation Help Darwin. A general recall was issued to all personnel; of the 2,700 Sydney based sailors on leave at the time, approximately 2,200 were able to return to their ships, with other volunteers filling any vacant positions onboard. The first RAN assets began to arrived in Darwin on 26 December, a Hawker-Siddeley 748 from 851 Squadron landed at Darwin Airport carrying blood transfusion equipment and Red Cross workers, followed shortly by another HS748 carrying Clearance Diving Team One (CDT 1). Ships also began departing for Darwin on 26 December. HMAS Balikpapan and HMAS Betano sailed from Brisbane, HMAS Flinders sailed from Cairns and HMAS Melbourne, Brisbane and Stuart sailed from Sydney. The following day HMA Ships Hobart, Stalwart, Supply and Vendetta sailed from Sydney and HMAS Brunei and Tarakan departed Brisbane. Nine Wessex helicopters from 725 and 817 Squadron were embarked on Melbourne and Stalwart.
The RAN taskforce was tasked with the responsibility of clearing and restoring 4740 houses in the northern suburbs of Nightcliff, Rapid Creek and Casuarina. RAN aircraft continued to ferry supplies and personnel into Darwin and evacuate displaced Darwin citizens. Some displaced residents were housed in the many naval bases located on Sydney Harbour and HMAS Moreton in Brisbane.
The first vessels, HMA Ships Brisbane and Flinders, arrived in Darwin on 31 December. Flinders surveyed the approaches to Darwin, ensuring the safety of the taskforce, while Brisbane landed working parties and established communications. The entire task force had arrived in Darwin by 13 January 1975, the force brought more than 3,000 personnel to the city. Men of the task force usually worked in small working parties of 10 to 15 men.
The men and women of the RAN made a significant contribution to the relief effort; from January 1 to January 30 naval personnel spent 17,979 man days ashore, with up to 1,200 personnel ashore at one time. Some 1,593 housing blocks were cleared and government and private facilities cleaned up. Westland Wessex helicopters transported 7,832 passengers, 110,912 kg of supplies and freight and made 2,505 landings. The Hawker-Siddeley 748 aircraft made a total of 14 return flights to Darwin and carried out 485 passengers and brought in 22,680 kg of freight. Vessels of the task force began to depart Darwin as early as 7 January, with HMA Ships Brisbane and Stalwart the last to depart on 31 January. With the departure of the majority of the RAN personnel, the command of the relief operation was turned over to the Commandant of the Army's 7th Military District.
Pacific patrol boat program
Following the introduction of the 1982 United Nations Convention on the Law of the Sea (UNCLOS) the exclusive economic zone (EEZ) of many coastal nations was increased from 12 nautical miles (NM) to 200 NM. The sudden expansion of responsibility dramatically increased the area of ocean requiring surveillance, monitoring and policing by these nations, increasing the strain on existing maritime patrol resources, and highlighting the need for countries without a maritime patrol force to obtain one, especially in the South West Pacific area.
In 1979 the Australian and New Zealand governments, at the request of Pacific Island nations, sent defence representatives into the South-West Pacific region to assess surveillance and maritime patrol requirements. The governments of a number of the Pacific nations expressed their concern about the need for a suitable naval patrol force to meet their new surveillance requirements. The Australian government responded by creating the Defence Cooperation Project (DCP), to provide suitable patrol vessels, training and infrastructure to island nations in the region. The Pacific Patrol Boat Systems Program Office was created within the Minor War Vessels Branch of the RAN procurement organisation.
The tender for the vessels was released in August 1984, and was awarded to Australian Shipbuilding Industries Pty Ltd (now Tenix Western Australia) in September 1985. The first of ten vessels was to be delivered in early 1987. The first vessel, HMPNGS Tarangau, was officially handed over to the Papua New Guinea Defence Force on 16 May 1987. Over the course of the project the number of participating countries increased. By the end of the construction phase of the project, a total of 22 boats had been delivered to 12 countries, compared to the original order of 10 boats for 8 countries. In total, the project cost for 22 vessels and associated support was $A155.25 million.
The RAN never operated the Pacific class patrol boat (PPB), although the project has given the RAN a number of advantages in the Pacific region. The introduction of self-reliant patrol forces throughout the region has eased the strain on Australia’s own maritime patrol force. Cooperation between Australia and its Pacific neighbours has allowed for a greater allocation of RAN patrol boats to protecting Australia’s maritime resources, patrolling the Sea Lines of Communication (SLOC), and conducting border protection operations. The PPB's have recently undergone a mid life refit which could potentially see them operating in the region until at least 2027.
Two ocean navy policy
The main role of the Royal Australian Navy in the two decades following the end of Australia's involvement in the Vietnam War was supporting Australian diplomatic initiatives. In line with this goal the RAN exercised with the navies of Australia's allies and provided support to civil authorities in Australia and the South Pacific. The RAN's main military concern from the 1970s was the activities of the Soviet Navy in the Indian Ocean. These concerns lead to increased cooperation with the United States Navy and the development of the RAN's main base in Western Australia, HMAS Stirling.
During the late 1970s, the RAN replaced many of its aging ships with modern equivalents. While it was planned to purchase the British aircraft carrier HMS Invincible to replace Melbourne, Britain's offer of the carrier was withdrawn after the Falklands War. As a result, Melbourne was decommissioned without replacement in 1982 and the Fleet Air Arm retired almost all of its fixed wing aircraft on 30 June 1983.
In 1987, the Hawke Government's Defence White Paper called for the RAN to become a more self reliant two-ocean navy with major fleet bases in New South Wales and Western Australia. The plan called for the expansion of Stirling on Garden Island and Jervis Bay to accommodate an expanded RAN combat surface and submarine fleets. The plan originally called for the major combat units and submarines to be split between the two fleet bases, providing similar capabilities on both sided of the continent. The proposed Jervis Bay naval base never became a reality; Fleet Base East was built up around HMAS Kuttabul in Sydney while HMAS Stirling is home to half the surface fleet and the entire submarine fleet. The rationale behind the policy included the possibility of savings in fuel and maintenance that would result from Indian Ocean deployments beginning their journey from Western Australia rather than New South Wales. The report also classed the Indian Ocean as an area where contingencies might arise. The new facilities would increase Australia's worth to the United States, particularly to do with maintenance of submarines. Expansion at Jervis Bay would allow intensified east coast visits by the US Pacific Fleet, and its nuclear warship visits would not run into as much opposition as they do in Sydney and Melbourne.
The 1987 White Paper was seen by many as an attempt to strengthen Australia's relationship with the United States, which had been damaged by New Zealands stance against nuclear weapons in its ports. In line with this policy the RAN was structured to become more self-reliant and its activities during the late 1980s were focused on operating within Australia's local region.
The Two Ocean Policy remains in place today and is supported by the current government and the opposition. The success of the policy is especially evident at HMAS Stirling. The base is thriving and its location both in a global and local context gives it an advantage over Fleet Base East. It has been suggested that all 8 units of the Anzac class be relocated to Stirling, this would create an easier training environment for sailors and would lead to significant cost savings.
Post Cold War
The Gulf Wars
Australia's contribution to the 1991 Gulf War centered around a Naval Task Group which formed part of the multi-national fleet in the Persian Gulf and Gulf of Oman. In addition, medical teams were deployed aboard a U.S. hospital ship and a naval clearance diving team took part in de-mining Kuwait's port facilities at the end of the war. Over the period from 6 September 1990 to 4 September 1991 the RAN deployed a total of 6 ships to the area; Adelaide, Brisbane, Darwin, Success, Sydney and Westralia. Clearance Diving Team 3 operated in the theatre from 27 January 1991 to 10 May 1991. It was involved in mine clearing operations in Kuwait from 5 March to 19 April 1991.
After the end of the first Gulf War the Royal Australian Navy periodically deployed a ship to the Gulf or Red Sea to assist in maintaining sanctions against Iraq. Until the outbreak of the Second Gulf War the Australian naval force in the Persian Gulf continued to enforce the sanctions against Iraq. These operations were conducted by boarding parties from the RAN warships.
Upon the outbreak of war the RAN's focus shifted to supporting the coalition land forces and clearing the approaches to Iraqi ports. HMAS Anzac provided gunfire support to Royal Marines during fighting on the Al-Faw Peninsula and the Clearance Diving Team took part in clearing the approaches to Umm Qasr. Boarding operations continued during the war, and on 20 March boarding parties from the HMAS Kanimbla seized an Iraqi ship carrying 86 naval mines.
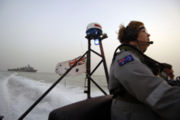
Since the end of the war the RAN has continuously maintained a frigate in the Persian Gulf to protect Iraq's oil infrastructure and participate in counter-smuggling operations. Twelve Australian sailors were deployed to Umm Qasr, Iraq between January and October 2004 to join the multi-national training team working with the Iraqi Coastal Defense Force. The RAN has also assumed command of coalition forces in the Persian Gulf on two occasions; Combined Task Force 58 in 2005 and Combined Task Force 158 in 2006.
HMAS Westralia
On 5 May 1998 a fire broke out onboard HMAS Westralia while off the Western Australia coast. The fire was caused by the rupture of a flexible fuel line (one of a number used to replace rigid hoses) on cylinder number nine starboard engine. This sprayed diesel fuel onto a hot indicator cock, which ignited a spray fire. The resulting fire caused the deaths of four people onboard. Following the fire the Australian Government and the RAN began a major investigation known as the Westralia Board of Inquiry. The enquiry found that the RAN and the contractor Australian Defence Industries (ADI) did not critically examine their course of action and that key personnel in the RAN and the contractor were insufficiently trained and qualified. The inquiry also found that the hoses were not properly designed and were unfit for the intended purpose. In 2005 ADI was fined $75,000 for failing to provide a safe workplace. Seven sailors who were apparently severely traumatised by the fire have also sued ADI and sub contractor Jetrock. In August 2006, the Australian Government decided to accept liability after it reached settlement with the ADI and Jetrock. The seven sailors stand to receive compensation totalling up to $10 million.
East Timor
During the Australian lead United Nations peacekeeping mission to East Timor in 1999 known as INTERFET, the RAN deployed a total of 16 ships to the mission: Adelaide, Anzac, Balikpapan, Brunei, Darwin, Farncomb, Jervis Bay, Labuan, Success, Sydney, Tarakan, Tobruk, Waller, Westralia, HMAS Newcastle (F 06) and HMAS Melbourne (F0 05). The RAN played a vital role in transporting troops and providing protection to transports and were vital to the success of INTERFET.
The RAN returned to East Timor in 2006 under Operation Astute the United Nations-authorised, Australian-led military deployment to East Timor to quell unrest and return stability during the 2006 East Timor crisis. The Royal Australian Navy deployed the Amphibious Ready Group including the ships; Kanimbla, Manoora, Tobruk (until approximately 8 June), Balikpapan, Tarakan, Success (until 28 May). The navy also deployed the Adelaide class frigate HMAS Adelaide (until 28 May). The Fleet Air Arm contributed one S-70B-2 Seahawk helicopter from 816 Squadron RAN (until 28 May) and two Sea King helicopters from 817 Squadron RAN. The Royal Australian Navy force committed to Operation Astute is apparently the largest amphibious task force in the Navy's history.
Solomon Islands
On 24 July 2003, HMAS Manoora arrived off Honiara marking the beginning of Operation Anode, Australia's contribution to the Regional Assistance Mission to the Solomon Islands (RAMSI). The deployment of a 2,200 strong multinational force followed several years of unrest in the Solomon Islands. Manoora was soon joined by HMA Ships Hawkesbury, Labuan, Wewak and Whyalla. Following the initial deployment two vessels were generally kept on station in the area. By the time the RAN deployment ended, some 19 Australian warships had taken part. The last ship to leave was HMAS Fremantle which sailed home in October 2004.
Operation Anode was not the first time units of the RAN had been deployed to the Solomon Islands; Anode was unique in that the navy's primary role was to support and facilitate the work of the Participating Police Force (PPF). Moreover, in addition to being the first time the RAN had supported a police-led mission. Operation Anode and RAMSI is one of the latest examples of the role Australia and specifically the RAN is playing in stabilising the Pacific region.
Fiji
On 2 November 2006, in response to the Fijian Military threats to overthrow the Fijian Government, the Australian government deployed military resources in support of Australian citizens in Fiji. The contribution from the RAN was the deployment of three vessels; HMA Ships Kanimbla, Newcastle and Success to international waters south of Fiji. The three vessels were deployed to Fiji to evacuate the estimated 7,000 Australian citizens present in Fiji if the need arose. Along with the three vessels a detachment of the Special Air Service Regiment, helicopters from the 171st Aviation Squadron and an evacuation team were also deployed.
On 29 November 2006, an Australian Army S-70A Black Hawk helicopter operating from Kanimbla, and carrying ten Army personnel on board, crashed whilst attempting to land on the ship's deck, killing 1 person, injuring 7 more and leaving one missing (later confirmed dead).. HMAS Melville arrived on task the morning of 15 December 2006, equipped with a Towed Pinger Locating Drone supplied from the United States Navy set about locating the downed Black Hawk. Melville detected the locator beacon during its first pass over the crash site and pinpointed its exact location in subsequent passes. The helicopter is sitting in around 2900 metres of water.
The coup took place on 5 December, but was bloodless and almost completely without violence. The evacuation of Australians was deemed unnecessary, and vessels of the task force began arriving back in Australian on December 17, with Kanimbla docking in Townsville, and both Newcastle and Success are returning to Sydney. Melville returned to Australia in late December. The RAN has decided to attempt to recover the downed Black Hawk and has identified the United States Navy Supervisor of Salvage (SUPSALV) as the preferred organisation. The MV Seahorse Standard recovered the remains of Trooper Porter on 5 March and the Blackhawk helicopter on 9 March with the assistance of specialist equipment provided by the SUPSALV team. Trooper Porters body was repatriated on 13 March escorted by members of the Special Air Service Regiment. Seahorse Standard will arrive in Australia with the aircraft wreckage by the end of march. The wreckage will become evidence in the Board of Inquiry into the crash.
Women in the RAN
From 1911 to 1941 women were forbidden from serving in the RAN; the demands World War II placed on personnel and resources led to a change of policy. On 21 April 1941 the Australian Naval Board sent a letter authorising the entry of women into the RAN to the Commodore-in-Charge, Sydney. The letter led to the formation of the Women's Royal Australian Naval Service (WRANS) and the Royal Australian Naval Nursing Service (RANNS). The two separate women's services existed until 1984 when they were incorporated into the permanent force. Today female members of the RAN have a wide variety of roles open to them; women serve on submarines, command ships and shore postings and are expected to play an increasingly important role in the future of the RAN.
The current navy
The Royal Australian Navy today is a medium sized modern navy in world terms but is one of the strongest navies in the Asia Pacific Region. Today the combat fleet of the RAN is made up of 8 Anzac class frigates, 5 Adelaide class frigates, 9 patrol boats of the Armidale classand 6 Collins class submarines. The RAN also comprises a large amphibious and supply force in order to transport the Australian Army and to resupply the combat arm of the navy. The RAN is divided into 7 Force Element Groups (FEG); Surface Combatants, Amphibious Warfare Forces and Afloat Support Force, Naval Aviation, Submarine Force, Mine Warfare and Clearance Diving, Patrol Boat Force and the Hydrographic Force. The FEG's were formed to manage the operations of the separate sections of the RAN in a more efficient way.
The modern RAN began to form during the late 1970s when the Fraser Government announced the purchase of 4 Oliver Hazard Perry class frigates, all to be built in America; in 1980 they announced an additional 2 vessels both to be built in Australia. The 15 vessels of the Fremantle class have been Australia's lead patrol boat since 1979, replacing the Attack Class, all Attack class vessels were decommissioned by 1985. The Fremantle class is itself being replaced with the Armidale class; today only 5 of the 15 Fremantle class ships remain in service.
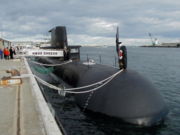
The Collins class is the newest class of Australian submarines, built in Australia for the Royal Australian Navy. They were built by the Australian Submarine Corporation in Adelaide, South Australia and replace much older Oberon class submarines in the Australian fleet. The first vessel HMAS Collins was laid down in 1990 and commissioned in 1996, as of 2002 all six vessels of the class are operational and based HMAS Stirling in Western Australia.
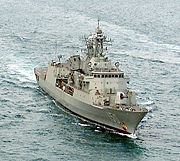
The Anzac class is the current main fleet unit of the Royal Australian Navy; the class comprises 8 vessels. The lead vessel of the class. HMAS Anzac, was commissioned in 1996 and the final vessel, HMAS Perth, was commissioned on the 26 August 2006. In addition to the 8 Australian vessels, two Anzacs were also constructed for the Royal New Zealand Navy. The Anzac class were jointly constructed in New Zealand and Australia with the final fitout in Williamstown, Victoria.
The amphibious and supply arm of the RAN is made up of; 2 Kanimbla class landing platform, one heavy landing ship HMAS Tobruk, 6 Balikpapan class landing craft, 2 Leeuwin class survey ships, 4 Paluma class motor launches, one fleet oiler, HMAS Sirius and the Dual Stores Replenishment Vessel HMAS Success. The RAN also has 6 Huon class minehunters, five in service and one in active storage as of 2006.
The Royal Australian Navy maintains several bases around Australia. Under the RAN's Two Ocean Policy two of these HMAS Stirling (Fleet Base West) and HMAS Kuttabul (Fleet Base East) are the base for all major fleet unit of the RAN. The majority of the patrol boat and amphibious fleets are located at HMAS Cairns and HMAS Coonawarra while all Fleet Air Arm squadrons are located at HMAS Albatross in New South Wales.
The future of the RAN
In 2000 a major white paper was produced by the Australian government which set out a program of defence spending that will see significant improvements to the RAN's fleet and capabilities.
The most significant current project is Sea4000 the procurement of three Hobart class destroyers, which will replace the Adelaide class.. These ships will be fitted with the AEGIS combat system, and will be based on the Spanish F100 design. The class has a planned in service date of 2013, with the three units to be named Hobart, Brisbane and Sydney.
The RAN is currently in the process of replacing its patrol boat fleet. The 15 Fremantle class patrol boats which entered service in 1979 are currently being replaced with 14 Armidale class vessels. Designed and built by Austal Ships, the lead ship of the Armidale class, HMAS Armidale was commissioned into the RAN in June 2005. The entire Armidale class fleet is expected to be in service by late 2007 and will provide greater flexibility and capabilities to the RAN.
In August 2005 the Australian Government passed approval for the acquisition of two Canberra class large amphibious ships; these will displace over 20,000 tonnes and have the capability to carry over 1,000 troops and will potentially be able to operate fixed wing aircraft. The project is expected to cost between $1.5 and $2 billion Australian dollars and be completed by around 2014. The new ships will be named Canberra and Adelaide.

