Second Boer War
2008/9 Schools Wikipedia Selection. Related subjects: Pre 1900 Military
| Second Anglo-Boer War | |||||||||
|---|---|---|---|---|---|---|---|---|---|
| Part of the Boer Wars | |||||||||
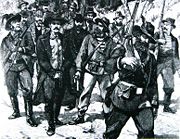
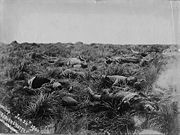
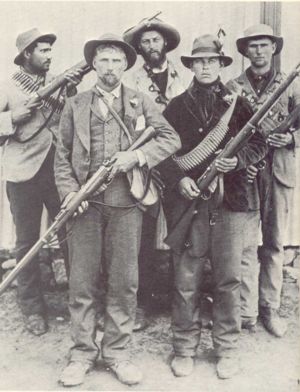 Boer guerrillas during the Second Boer War |
|||||||||
|
|||||||||
| Belligerents | |||||||||
| Commanders | |||||||||
| Casualties and losses | |||||||||
| 6,000 - 7,000 (A further ~14,000 from disease) | 6,000 - 8,000 (Unknown number from disease) | ||||||||
| Civilians killed [mainly Boers]: 24,000+ | |||||||||
|
|||||
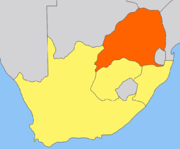
The Second Boer War (Dutch: Tweede Boerenoorlog, Afrikaans: Tweede Boereoorlog), commonly referred to as The Boer War and also known as the South African War (outside of South Africa), the Anglo-Boer War (among most South Africans) and in Afrikaans as the Boereoorlog or Tweede Vryheidsoorlog ("Second War of Liberation"), was fought from 11 October 1899 until 31 May 1902, between the British Empire and the two independent Boer republics of the Orange Free State and the South African Republic (Transvaal Republic).
The origins of the war were complex, resulting from over two centuries of conflict between the Boers and the British. The British had, in 1806, during the Napoleonic Wars, taken permanent possession of the Cape Colony and over subsequent decades successive waves of Boers had migrated away from the rule of the British Empire in the Cape Colony, first along the eastern coast towards Natal and then, after Natal was annexed in 1843, northwards towards the interior where two independent Boer republics (the Orange Free State, and the South African Republic - also called the Transvaal) were established. The British recognised the two Boer Republics in 1852 and 1854 but the annexation of the Transvaal in 1877 lead to the First Boer War, 1880-1. After British defeats, most heavily at the Battle of Majuba, Transvaal independence was restored subject to certain conditions but relations were uneasy.
When, in 1886, massive deposits of gold were discovered in the Transvaal, a huge inflow of uitlanders (foreigners), mainly from Britain, came to the region in search of employment and fortune. Gold made the Transvaal the richest and potentially the most powerful nation in southern Africa but it also resulted in the number of uitlanders in the Transvaal eventually exceeding the number of Boers and precipitated confrontations over the old order and the new. Disputes over uitlander political and economic rights resulted in the failed Jameson Raid of 1895. This raid led by (and named after) Dr Leander Starr Jameson, the Administrator in Rhodesia of the Chartered Company, was intended to encourage an uprising of the uitlanders in Johannesburg. However Johannesburg failed to rise and Transvaal government forces surrounded the column and captured Jameson's men before they could reach Johannesburg.
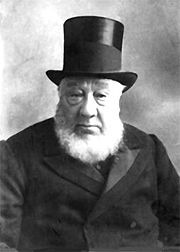
As tensions escalated from local to national level, there were political manouverings and lengthy negotiations to reach a compromise ostensibly over the issue of 'uitlander rights' but ultimately over control of the gold mining industry and the British desire to incorporate the Transvaal and the Orange Free State in a federation under British control. Given the number of British uitlanders already resident in the Transvaal and the ongoing inflow, the Boers recognised that the franchise policy demanded by the British would inevitably result in the loss of independence of the Transvaal. The negotiations failed and in September 1899, Joseph Chamberlain (the British Colonial Secretary) sent an ultimatum to the Boers, demanding full equality for those uitlanders resident in the Transvaal. President Kruger, seeing no other option than war, issued his own ultimatum giving the British 48 hours to withdraw all their troops from the border of the Transvaal, failing which the Transvaal, allied with the Orange Free State, would declare war against the British. The rejection of the ultimatum followed and war was declared.
The war had three distinct phases. First, the Boers mounted pre-emptive strikes into British-held territory in Natal and the Cape Colony, besieging the British garrisons of Ladysmith, Mafeking and Kimberley. The Boers then won a series of tactical victories at Colenso and Spion Kop against a failed British counter-offensive to relieve the three sieges. Second, after the introduction of greatly increased British troop numbers under the command of Lord Roberts, another and this time successful British offensive was launched in 1900 to relieve the sieges. After Natal and the Cape Colony was secure, the British were able to invade the Transvaal and the republic's capital, Pretoria, was captured in June 1900.
Finally, beginning in March 1900, the Boers engaged a protracted hard-fought guerrilla warfare against the British forces. This lasted a further eighteen months during which the Boers raided targets such as British troop columns, telegraph sites, railways and storage depots. In an effort to cut off supplies to the raiders, the British, now under the control of Lord Kitchener, responded with a scorched earth policy of destroying Boer farms and by moving civilians into concentration camps.
The campaign had been expected by the British government to be over within months, and the protracted war became increasingly unpopular especially after revelations about the conditions in the concentration camps (where thousands died of disease and malnutrition). The demand for peace led to a settlement of hostilities, and in 1902 the Treaty of Vereeniging was signed. The two Republics were absorbed into the British Empire, although the British were forced to make a number of concessions and reparations to the Boers. The granting of limited autonomy for the area ultimately lead to the establishment of the Union of South Africa. The war had a lasting effect on the region and on British domestic politics. The war, known as the last British imperial war, was the longest (almost three years), the most expensive (over £200 million), and the most disastrous of all wars for Britain between 1815 and 1914.
Background
The southern part of the African continent was dominated in the 19th century by a set of epic struggles to create within it a single unified state. While the Berlin Conference of 1884-5 sought to draw boundaries between the European powers' African possessions, it set the stage for further scrambles. The British attempted to annex first the Transvaal in 1880, and then in 1899 both the Transvaal and the Orange Free State. In 1868, the British annexed Basutoland in the Drakensberg Mountains following an appeal from Moshesh, the leader of a mixed group of African refugees from the Zulu wars, who sought British protection against the Boers. In the 1880s, Bechuanaland (modern Botswana, located north of the Orange River) became the object of dispute between the Germans to the west, the Boers to the east, and Cape Colony to the south. Although Bechuanaland had no economic value, the "Missionaries Road" passed through it towards territory farther north. After the Germans annexed Damaraland and Namaqualand (modern Namibia) in 1884, the British annexed Bechuanaland in 1885.
The Boers of the Transvaal Republic had in the 1880-1881 war (" First Boer War") proved skillful fighters in resisting the British attempt at annexation, resulting in a series of British defeats. The British government of William Gladstone had been unwilling to become bemired in a distant war, which required substantial troop reinforcement and expense, for what was at the time was perceived to be minimal return. An armistice followed, ending the war, and subsequently a peace treaty followed with the Transvaal President Paul Kruger.
Gold and the Uitlanders
However when, in 1886, a major gold field find was made at an outcrop on a large ridge some thirty miles south of the Boer capital at Pretoria, it reignited British imperial interests. The ridge, known locally as the "Witwatersrand" (literally "white water ridge"—a watershed) contained the world's largest deposit of gold-bearing ore. Although it was not as rich as gold finds in Canada and Australia, its consistency made it especially well-suited to industrial mining methods. With the 1886 discovery of gold in Transvaal, thousands of British and other prospectors and settlers streamed over the border from the Cape Colony (annexed by Britain earlier) and from across the globe.
The city of Johannesburg sprang up as a shanty town nearly overnight as the uitlanders (foreigners) poured in and settled around the mines. The influx was such that the uitlanders quickly outnumbered the Boers in Johannesburg and along the Rand, although they remained a minority in the Transvaal as a whole. The Boers, nervous and resentful of the stream of arrivals and the uitlanders' growing presence, sought to contain their influence through requiring lengthy residential qualifying periods before voting rights were obtained, imposing taxes on the gold industry, and introducing controls through licensing, tariffs and administrative requirements. Amongst the issues giving rise to tension between the Transvaal government on the one hand, and the Uitlanders and British interests on the other, were:
(a) the established uitlanders including the mining magnates wanted political, social and economic control over their lives and hence rights including a stable constitution, a fair franchise law, an independent judiciary, and a better educational system. The Boers for their part recognized that the more concessions they made to the Uitlanders the greater the likelihood, with approximately 30,000 white male Boer voters and potentially 60,000 white male Uitlander, that the independence of the Transvaal would be lost and absorbed into the British Empire;
(b) the uitlanders resented the taxes levied by the Transvaal government, particularly where the monies raised were not expended on Johannesburg or uitlander interests but diverted to projects elsewhere in the Transvaal. By way of example, as the gold-bearing ore sloped away from the outcrop underground to the south, more and more blasting was necessary for extraction and mines consumed vast quantities of explosives. A box of dynamite costing five pounds included five shillings tax. Not only was this tax perceived as exorbitant but British interests were offended when President Paul Kruger gave monopoly rights for the manufacture of the explosive to a non-British operation of the Nobel company, which infuriated the British. The so-called "dynamite monopoly" became a major pretext for war.
(c) British imperial interests were alarmed when in 1894–95 Kruger proposed building a railway through Portuguese East Africa to Delagoa Bay, thereby bypassing British controlled ports in Natal and Cape Town and avoiding British tariffs. At the time the Prime Minister of the Cape Colony was Cecil Rhodes, a man driven by a vision of a British controlled Africa extending from Cape to Cairo.
Certain self appointed Uitlanders representatives, and certain British mine owners, became increasingly angered and frustrated by their dealings with the government of the Transvaal Republic. A Reform Committee (Transvaal) was formed to represent the Uitlanders.
Jameson Raid
In 1895, a plan was hatched with the connivance of the Cape Prime Minister Cecil Rhodes, a Johannesburg gold magnate Alfred Beit and Sir Alfred Milner (British High Commissioner for South Africa and Leutentant Governor of the Cape) to liberate Johannesburg from the control of the Transvaal government. A column of 600 armed men (mainly made up of his Rhodesian and Bechuanaland policemen) was led by Dr Leander Starr Jameson (the Administrator in Rhodesia of the Chartered Company of which Cecil Rhodes was the Chairman) over the border from Rhodesia towards Johannesburg. The column was equipped with 6 Maxim machine guns, two 7 pounder mountain guns and a 12 1/2 pounder field piece. The plan was to make a 3 day dash to Johannesburg before the Boer commandos could mobilise, and once there, trigger an uprising by the primarily British expatriate workers (uitlanders) organised by the Reform Committee. However, the Transvaal authorities had advance warning of the Jameson Raid) and tracked it from the moment it crossed the border. Four days later, the weary and dispirited column was surrounded near Krugersdorp within sight of Johannesburg. After a brief skirmish in which the column lost 65 killed and wounded, and the Boers lost one man, Jameson's men surrendered and were, in turn, arrested by the Boers.
The botched Jameson Raid resulted in repercussions throughout southern Africa with reverberations in Europe. In Rhodesia, the departure of so many policeman enabled the Matabele and Mashona tribes to rise up against the Chartered Company, and the rebellion could be suppressed only at great cost. A few days after the raid, the Kaiser of Germany sent a telegram (" Kruger telegram") congratulating President Kruger and the Transvaal government on their success, and when this was disclosed in the British press, it raised a storm of anti-German feeling. In the baggage of the raiding column, to the great embarrassment of the British, the Boers found telegrams from Cecil Rhodes, and the plotters in Johannesburg. Joseph Chamberlain, the British Colonial Secretary, quickly moved to condemn the raid despite previously having approved Rhodes' plans to send armed assistance in the case of a Johannesburg uprising. Subsequently Cecil Rhodes was severely censured at the Cape enquiry and the London parliamentary enquiry, and forced to resign as Prime Minister of the Cape and as Chairman of the Chartered Company for having sponsored the failed coup d'état.
What of the British men arrested in the Jameson Raid? The Boer government handed them over to the British for trial. Dr Jameson was tried in England for leading the raid. However, the British press and London society inflamed by anti-Boer and anti-German feeling and in a frenzy of jingoism, lionized Dr Jameson and treated him as a hero. Although sentenced to 15 months imprisonment (which he served in Holloway) Dr Jameson was later rewarded with Prime Ministership of the Cape Colony (1904-08) and ultimately anointed as one of the founders of the Union of South Africa). For conspiring with Jameson, the Uitlander members of the Reform Committee (Transvaal) were tried in the Transavaal courts and found guilty of high treason. They were sentenced to death by hanging but this sentence was later commuted to 15 years' imprisonment, and in June 1896, all surviving members of the Committee were released on payment of stiff fines by the British .
Of the Jameson Raid, Jan C. Smuts wrote in 1906, "The Jameson Raid was the real declaration of war...And that is so in spite of the four years of truce that followed...[the] aggressors consolidated their alliance...the defenders on the other hand silently and grimly prepared for the inevitable."
Escalation and war
The Jameson Raid alienated many Cape Afrikaners from the British, and united the Transvaal Boers behind President Kruger and his government. It also had the effect of drawing the Transvaal and the Orange Free State (led by President Martinus Theunis Steyn) together in opposition to perceived British imperialism. In 1897 a military pact was concluded between the two republics. President Paul Kruger proceeded to re-equip the Transvaal army, and imported 37,000 of the latest magazine Mauser rifles, and some of the most modern artillery in Europe including German Krupp artillery . The Transvaal army was within a short period transformed; approximately 25,000 men equipped with modern rifles and artillery could mobilise within two weeks. However, President Kruger's victory in the Jameson Raid incident however did nothing to resolve the fundamental problem; the impossible dilemma continued, namely how to make concessions to the Uitlanders without surrendering the independence of the Transvaal.
The failure to gain improved rights for Uitlanders became a pretext for war, and to justify a major military buildup in the Cape Colony. The case for war was justified and espoused as far away as the Australian colonies. Several key British colonial leaders favoured annexation of the independent Boer republics. These figures included the Cape Colony governor Sir Alfred Milner, Cape Prime Minister Cecil Rhodes, British Colonial Secretary Joseph Chamberlain and mining syndicate owners or Randlords (nicknamed the gold bugs) such as Alfred Beit, Barney Barnato and Lionel Phillips. Confident that the Boers would be quickly defeated, they planned and organised a short war, citing the Uitlanders' grievances as the motivation for the conflict.
President Steyn of the Orange Free State invited Milner and Kruger to attend a conference in Bloemfontein which started on 30 May 1899, but negotiations quickly broke down, despite Kruger's offer of concessions. In September 1899, Chamberlain sent an ultimatum demanding full equality for British citizens resident in Transvaal. Kruger, seeing that war was inevitable, simultaneously issued his own ultimatum prior to receiving Chamberlain's. This gave the British 48 hours to withdraw all their troops from the border of Transvaal; otherwise the Transvaal, allied with the Orange Free State, would declare war.
News of the ultimatum reached London on the day it expired. Outrage and laughter were the main responses. The editor of the Times laughed out loud when he read it, saying 'an official document is seldom amusing and useful yet this was both'. The Times denounced the ultimatum as an 'extravagant farce', The Globe denounced this 'trumpery little state'. Most editorials were similar to the Daily Telegraph, which declared: 'of course there can only be one answer to this grotesque challenge. Kruger has asked for war and war he must have!'.
First phase: The Boer offensive (October – December 1899)
War was declared on 11 October 1899. The Boers had no problems with mobilisation, since the fiercely independent Boers had no regular army units (apart from the Staatsartillerie of both republics). When danger threatened, all the burghers (citizens) in a district would form a military unit called a commando and would elect officers. A full-time official titled a Feldcornet maintained muster rolls, but had no disciplinary powers. Each man brought his own weapon and his own horses. The Presidents of the Transvaal and Orange Free State simply signed decrees to concentrate within a week and the Commandos could muster between 30-40,000 men.
Although it seemed a mismatch between the might of the British Empire on the one hand and farmers on the other, and the British anticipated a quick and easy victory, it became clear from the start that Britain would have problems. What the Boers presented was a mobile and innovative approach to warfare, drawing on their experiences from the First Boer War and strategies that had first appeared in the American Civil War. The average Boers who made up their Commandos were farmers who had spent almost all their working life in the saddle both as farmers and hunters. They had to depend for the pot on their horse and their rifle and were skilled stalkers and marksmen. As hunters they had learnt to fire from cover, from a prone position and to make the first shot count, knowing that if they missed the game would be long gone. At community gatherings, target shooting was a major sport and they practised shooting at targets such as hens' eggs perched on posts 100 yards away. They made expert light cavalry, using every scrap of cover, from which they could pour in a destructive fire using their modern Mauser rifles. Furthermore, in preparation for hostilities the Boers had acquired around one hundred of the latest Krupp field guns, all horse drawn and dispersed among the various Commando group, and several Le Creusot "Long Tom" siege guns. The Boers' skill in adapting themselves to becoming first-rate artillerymen shows them to have been a versatile adversary.
The Boers struck first by invading Cape Colony and Colony of Natal between October 1899 and January 1900. With elements of both speed and surprise the Boer drove quickly towards the major British garrison at Ladysmith and the smaller ones at Mafeking and Kimberley. The quick Boer mobilisation resulted in early military successes against the scattered British forces.
Sir George White, commanding the British division at Ladysmith, had unwisely allowed Major-General Penn Symons to throw a brigade forward to the coal-mining town of Dundee (also reported as Glencoe) which was surrounded by hills. This became the site of the first engagement of the war, the Battle of Talana Hill. Boer guns began shelling the British camp from the summit of Talana Hill at dawn on October 20. Penn-Symons immediately counter-attacked. His infantry drove the Boers from the hill, but at the cost of 464 British casualties including Penn-Symons himself.
Another Boer force had occupied Elandslaagte which lay between Ladysmith and Dundee. The British under Major General John French and Colonel Ian Hamilton attacked to clear the line of communications to Dundee. The resulting Battle of Elandslaagte was a clear-cut British tactical victory, but Sir George White feared that more Boers were about to attack his main position and ordered a chaotic retreat from Elandslaagte, throwing away any advantage gained. The detachment from Dundee was compelled to make an exhausting cross-country retreat to rejoin White's main force.
As Boers surrounded Ladysmith and opened fire on the town with siege guns, White ordered a major sortie against the Boer artillery positions. The result was a disaster, with 140 men killed and over 1000 captured. The Siege of Ladysmith began, and was to last several months.
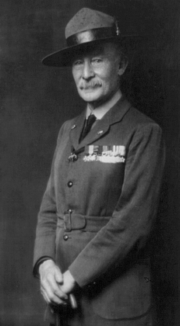
Meanwhile to the north-west at Mafeking, on the border with Transvaal, Colonel Robert Baden-Powell had raised two regiments of local forces amounting to some 1,200 men in order to attack and create diversions if things further south went amiss. Mafeking, being a railway junction, provided good supply facilities and was the obvious place for Baden-Powell to fortify in readiness for such attacks. However, instead of being the aggressor Baden-Powell and Mafeking were forced to defend when 6,000 Boer, commanded by Piet Cronje, attempted a determined assault on the town. But this quickly subsided into a desultory affair with the Boer prepared to starve the stronghold into submission and so, on the 13th October, began the 217-day Siege of Mafeking.
Lastly, over 200 miles to the south of Mafeking lay the large town of Kimberley, the centre of diamond mining, which was also subject to a siege. Although not militarily significant it nonetheless represented existing British Imperialism and hence an important Boer prize. From early November about 7,500 Boer began their siege, again content to starve the town into submission, but the 50,000 inhabitants of which only 5,000 were armed were under little threat as the town was well-stocked with provisions. The defending troops were commanded by Lieutenant Colonel Kekewich.
Siege life took its toll on both the defending soldiers and the civilians in the cities of Mafeking, Ladysmith, and Kimberley as food began to grow scarce after a few weeks. In Mafeking, Sol Plaatje wrote, "I saw horseflesh for the first time being treated as a human foodstuff." The cities under siege also dealt with constant artillery bombardment, making the streets a dangerous place. Near the end of the siege of Kimberley, it was expected that the Boers would intensify their bombardment, so a notice was displayed encouraging people to go down into the mines for protection. The townspeople panicked, and people flowed into the mineshafts constantly for a 12-hour period. Although the bombardment never came, this did nothing to diminish the distress of the civilians. Many of the townspeople, now under siege, sheltered in the local convent, now the Mcgregor museum. Since the mining that occurred there, for diamonds, was open air, the people were not able to shelter in mine shafts. The mine is now known as the Big Hole, a popular tourist attraction in the area.
First British relief attempts
It was at this point that General Sir Redvers Henry Buller, a much respected commander, arrived in South Africa with major British reinforcements (including an Army Corps of three divisions). Buller originally intended an offensive straight up the railway line leading from Cape Town through Bloemfontein to Pretoria. Finding on arrival that the British troops already in South Africa were under siege, he split his Army Corps into several widely spread detachments, to relieve the besieged garrisons. One force, led by Lieutenant General Lord Methuen, was to follow the Western Railway to the north and relieve Kimberley and Mafeking. A smaller force of about 3,000 led by Major General William Gatacre, was to push north toward the railway junction at Stormberg, to secure the Cape Midlands district from Boer raids and local rebellions by Boer inhabitants. Finally, Buller himself would lead the major force and relieve Ladysmith to the east.
The initial results of this offensive were mixed with Methuen winning several bloody skirmishes at Belmont on November 23, Graspan on November 25 and a larger conflict at the Modder River on November 28 resulting in British losses of 71 dead and over 400 wounded. British commanders had trained on the lessons of the Crimean War, and were adept at battalion and regimental set pieces with columns manoeuvring in jungles, deserts and mountainous regions; what they entirely failed to comprehend was the impact of destructive fire from trench positions, and the mobility of cavalry raids both of which had been developed in the American Civil War. The British troops went to war with what would prove to be antiquated tactics, and in some cases antiquated weapons , against the mobile Boer forces with the destructive fire of their modern Mausers, the latest Krupp field guns and their innovative tactics.
The middle of December was disastrous for the British army. In a period known as Black Week (10 – 15 December 1899), the British suffered a series of devastating losses at Magersfontein, Stormberg, and Colenso.
On December 10, General Gatacre tried to recapture Stormberg railway junction about 50 miles (80 km) south of the Orange River. Gatacre's attack was marked by administrative and tactical blunders, and the Battle of Stormberg ended in a British defeat, with 135 killed and wounded, as well as two guns and over 600 troops captured.
At the Battle of Magersfontein on December 11, Methuen's 14,000 British troops attempted to capture a Boer position in a dawn attack to relieve Kimberley. This turned into a disaster when the Highland Brigade became pinned down by accurate Boer fire. After suffering from intense heat and thirst for nine hours, they eventually broke in ill-disciplined retreat. The Boer commanders, Koos de la Rey and Piet Cronje, had devised a plan to dig trenches in an unconventional place to fool the British and to give their riflemen a greater firing range. The plan worked and this tactic helped write the doctrine of the supremacy of the defensive position, using modern small arms and trench fortifications. The British lost 120 killed and 690 wounded and were prevented from relieving Kimberley and Mafeking. A British soldier encapsulated the soldiers view of the defeat:
"Such was the day for our regiment
Dread the revenge we will take.
Dearly we paid for the blunder -
A drawing-room General’s mistake.
Why weren’t we told of the trenches?
Why weren’t we told of the wire?
Why were we marched up in column,
May Tommy Atkins enquire…."
But the nadir of Black Week was the Battle of Colenso on December 15 where 21,000 British troops commanded by Buller himself, attempted to cross the Tugela River to relieve Ladysmith where 8,000 Transvaal Boers, under the command of Louis Botha, were awaiting them. Through a combination of artillery and accurate rifle fire, and a better use of the ground, the Boers repelled all British attempts to cross the river. After his first attacks failed, Buller broke off the battle and ordered a retreat, abandoning many wounded men, several isolated units and ten field guns to be captured by Botha's men. Buller’s forces lost 145 men killed and 1,200 missing or wounded. The Boers suffered 40 casualties.
Second phase: The British offensive of January to September 1900
The British Government took these defeats badly and with the sieges still continuing was compelled to send two more divisions plus large numbers of colonial volunteers. By January 1900 this would become the largest force Britain had ever sent overseas, amounting to some 180,000 men with further reinforcements being sought.
While waiting for these reinforcements, Buller attempted to recover some of his lost reputation by making another bid to relieve Ladysmith by crossing the Tugela west of Colenso. Buller's subordinate, Major General Charles Warren, successfully crossed the river, but was then faced with a fresh defensive position centred on a prominent hill known as Spion Kop. In the resulting Battle of Spion Kop, British troops captured the summit by surprise during the early hours of January 24, 1900, but as the early morning fog lifted they realised too late that they were overlooked by Boer gun emplacements on the surrounding hills. The rest of the day resulted in a disaster caused by poor communication between Buller and his commanders. Between them they issued contradictory orders, on the one hand ordering men off the hill, while other officers ordered fresh reinforcements to defend it. The result was 350 men killed and nearly 1,000 wounded and a retreat back across the Tugela River into British territory. There were nearly 300 Boer casualties.
Buller attacked Louis Botha again on February 5 at Vaal Krantz and was again defeated. Buller withdrew early when it appeared that the British would be isolated in an exposed bridgehead across the Tugela, and was nicknamed "Sir Reverse" by some of his officers.
By taking command in person in Natal, Buller had allowed the overall direction of the war to drift. Because of concerns about his performance and negative reports from the field, he was replaced as Commander in Chief by Field Marshal Lord Roberts. Roberts first intended like Buller to attack directly along the Cape Town - Pretoria railway but, again like Buller, was forced to relieve the beleaguered garrisons. Leaving Buller in command in Natal, Roberts massed his main force near the Orange River and along the Western Railway behind Methuen's force at the Modder River, and prepared to make a wide outflanking move to relieve Kimberley.
Except in Natal, the war had stagnated. Except for a single attempt to storm Ladysmith, the Boers made no attempt to capture the besieged towns. In the Cape Midlands, the Boers did not exploit the British defeat at Stormberg, and were prevented from capturing the railway junction at Colesberg. In the dry summer, the grazing on the veld became parched, weakening the Boers horses and draught oxen, and many Boer families joined their menfolk in the siege lines and laagers (encampments), fatally encumbering Cronje's army.
Roberts launched his main attack on February 10, 1900 and although hampered by a long supply route, managed to outflank the Boers defending Magersfontein. On February 14, a cavalry division under Major General John French launched a major attack to relieve Kimberley. Although encountering severe fire, a massed cavalry charge split the Boer defences on February 15, opening the way for French to enter Kimberley that evening, ending its 124 days’ siege.
Meanwhile, Roberts pursued Piet Cronje’s 7,000 strong force, which had abandoned Magersfontein to head for Bloemfontein. General French’s cavalry was also ordered to assist in the pursuit by embarking on an epic 30-mile drive towards Paardeberg where Cronje was entrenched. At the Battle of Paardeberg from February 18 to February 27, Roberts then surrounded General Piet Cronje's retreating Boer army. On the 17th February, a pincer movement involving both French’s cavalry and the main British force attempted to take the entrenched position, but the frontal attacks were unco-ordinated and so easily repulsed by the Boers. Finally, Roberts resorted to bombarding Cronje into submission, but it took a further ten precious days and with the British troops using the polluted Modder River as water supply, resulting in a typhoid epidemic killing many troops. General Cronje was forced to surrender with 4000 men.
In Natal, Buller began his fourth attempt to relieve Ladysmith on February 14. Despite reinforcements his progress was painfully slow against stiff opposition. However, on February 26, after much deliberation, Buller used all his forces in one all-out attack for the first time and at last succeeded in forcing a crossing of the Tugela, and defeated Botha's outnumbered forces north of Colenso. Ladysmith was relieved after a siege lasting 118 days the day after Cronje surrendered, but at a total cost of 7,000 British casualties.
After a succession of defeats the Boers realised that against such overwhelming superiority of troops they had little chance of defeating the British and so became demoralised. Roberts then advanced into the Orange Free State from the west, capturing Bloemfontein, the capital, unopposed on March 13 with the Boer defenders escaping and scattering. Meanwhile, he detached a small force to relieve Baden-Powell, and the Relief of Mafeking on May 18, 1900 provoked riotous celebrations in Britain.
On the 28th May the Orange Free State was annexed and renamed the Orange River Colony.
After being forced to delay for several weeks at Bloemfontein due to shortage of supplies and enteric fever (caused by poor hygiene, drinking bad water at Paardeburg and appalling medical care),, Roberts resumed his advance. He was forced to halt again at Kroonstad for 10 days, due once again to the collapse of his medical and supply systems, then finally captured Johannesburg on May 31 and the capital of the Transvaal, Pretoria, on June 5. The first into Pretoria, was Lt. William Watson of the New South Wales Mounted Rifles, who persuaded the Boer to surrender the capital.(Before the war, the Boers had constructed several forts south of Pretoria, but the artillery had been removed from the forts for use in the field, and in the event the Boers abandoned Pretoria without a fight).
This allowed the Roberts to declare the war over, having won the principal cities and so, on the 3rd September 1900, the South African Republic was formally annexed.
British observers believed the war to be all but over after the capture of the two capital cities. However, the Boers had earlier met at the temporary new capital of the Orange Free State, Kroonstad, and planned a guerrilla campaign to hit the British supply and communication lines. The first engagement of this new form of warfare was at Sanna's Post on 31 March where 1,500 Boers under the command of Christiaan De Wet attacked Bloemfontein's waterworks about 23 miles (37 km) east of the city, and ambushed a heavily escorted convoy which resulted in 155 British casualties and the capture of seven guns, 117 wagons and 428 British troops.
After the fall of Pretoria, one of the last formal battles was at Diamond Hill on 11 – 12 June, where Roberts attempted to drive the remnants of the Boer field army beyond striking distance of Pretoria. Although Roberts drove the Boers from the hill, the Boer commander, Louis Botha, did not regard it as a defeat, for he inflicted more casualties on the British (totalling 162 men) while suffering around 50 casualties.
The set-piece period of the war now largely gave way to a mobile guerrilla war, but one final operation remained. President Kruger and what remained of the Transvaal government had retreated to eastern Transvaal. Roberts, joined by troops from Natal under Buller, advanced against them, and broke their last defensive position at Bergendal on August 26. As Roberts and Buller followed up along the railway line to Komatipoort, Kruger sought asylum in Portuguese East Africa (modern Mozambique). Some dispirited Boers did likewise, and the British gathered up much war material. However, the core of the Boer fighters under Botha easily broke back through the Drakensberg mountains into the Transvaal highveld after riding north through the bushveld. Under the new conditions of the war, heavy equipment was no use to them, and therefore no great loss.
There was much sympathy for the Boers on mainland Europe and in October, President Kruger and members of the Transvaal government left South Africa on the Dutch warship De Gelderland, sent by the Queen of the Netherlands Wilhelmina, who had simply ignored the British naval blockade of South Africa. Paul Kruger's wife however was too ill to travel and remained in South Africa where she died on 20 July 1901 without seeing Paul Kruger again. President Kruger first went to Marseille and then on to The Netherlands where he stayed for a while before moving finally to Clarens, Switzerland, where he died in exile on 14 July 1904.
POWs sent overseas
The first sizable batch of Boer prisoners of war taken by the British consisted of those captured at the Battle of Elandslaagte on 21 October 1899. At first, many were put on ships, but as numbers grew, the British decided they did not want them kept locally. The capture of 400 POWs in February 1900 was a key event, which made the British realise they could not accommodate all POWs in South Africa. The British feared they could be freed by sympathetic locals. They already had trouble supplying their own troops in South Africa, and did not want the added burden of sending supplies for the POWs. Britain therefore chose to send many POWs overseas.
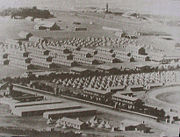
The first overseas (off African mainland) camps were opened in Saint Helena, which ultimately received about 5,000 POWs. About 5,000 POWs were sent to Ceylon. Other POWs were sent to Bermuda and India. Some POWs were even sent outside the British Empire, with 1443 Boers (mostly POWs) sent to Portugal. No evidence exists of Boer POWs being sent to the Dominions of the British Empire such as Australia, Canada or New Zealand.
Third phase: Guerrilla war (September 1900 – May 1902)
By September 1900, the British were nominally in control of both Republics, with the exception of the northern part of Transvaal. However, they soon discovered that they only controlled directly the territory which their columns physically occupied. The Boer commanders adopted guerrilla warfare tactics, primarily conducting raids against infrastructure, resource and supply targets, all aimed at disrupting the operational capacity of the British Army.
Each Boer commando unit was sent to the district from which its members had been recruited which meant that they could rely on local support and personal knowledge of the terrain and the towns within the district thereby enabling them to live off the land. Their orders were simply to act against the British whenever possible. Their tactics were to strike fast and hard causing as much damage to the enemy as possible, and then to withdraw and vanish before enemy reinforcements could arrive. The vast distances of the Republics allowed the Boer commandos considerable freedom to move about and made it impossible for the 250,000 British troops to control the territory effectively using columns alone. As soon as a British column left a town or district, British control of that area faded away.
The Boer commandos were especially effective during the initial guerrilla phase of the war because Roberts had assumed that the war would end with the capture of the Boer capitals and the dispersal of the main Boer armies. Many British troops were therefore redeployed out of the area, and had been replaced by lower-quality contingents of Imperial Yeomanry and locally-raised irregular corps.
From late May 1900, the first successes of the Boer strategy were at Lindley (where 500 Yeomanry surrendered), and at Heilbron (capturing a large convey and its escort) and other skirmishes resulting in 1,500 British casualties in less than ten days. As a result of these and other Boer successes the British, led by Lord Kitchener, mounted three extensive searches for De Wet, but without success. However, by its very nature the guerrilla war was sporadic, poorly planned and with little overall objective in mind except to harass the British. This lead to a disorganised pattern of scattered engagements throughout the whole region.
British response
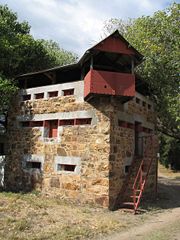
The British were forced to quickly revise their tactics. They concentrated on restricting the freedom of movement of the Boer commandos, and depriving them of local support. The railway lines had provided vital lines of communication and supply, and as the British had advanced across South Africa, they had used armoured trains and had established fortified blockhouses at key points. They now built additional blockhouses (, each housing 6-8 soldiers) and fortified these to protect supply routes against Boer raiders. Eventually some 10,000 such blockhouses were built radiating from the larger towns. Each blockhouse cost between 800 and 1,000 pounds and took 3 months to build. However, they proved very effective. Not one bridge where one of these blockhouses was sited and manned was blown.
The blockhouse system required an enormous number of troops to maintain. Well over 50,000 British troops, or 50 battalions, were involved in blockhouse duty, greater than the approximately 30,000 Boers in the field during the guerilla phase. In addition, up to 16,000 Africans were used both as armed guards and to patrol the line at night. The Army linked the blockhouses with barbed wire fences to parcel up the wide veld into smaller areas. "New Model" drives were mounted under which a continuous line of troops could sweep an area of veld bounded by blockhouse lines, unlike the earlier inefficient scouring of the countryside by scattered columns.
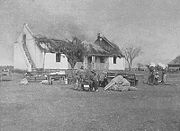
The British also implemented a " Scorched Earth" policy under which they targeted everything within the controlled areas that could give sustenance to the Boer guerrillas with a view to making it harder and harder for the Boers to survive. As British troops swept the countryside, they systematically destroyed crops, burned homesteads and farms, poisoned wells, and interned Boer and African women, children and workers in concentration camps. Finally, the British also established their own mounted raiding columns in support of the sweeper columns. These were used to rapidly follow and relentlessly harass the Boers with a view to delaying them, and cutting off escape, while the sweeper units caught up. Many of the 90 or so mobile columns formed by the British to participate in such drives were a mix of British and Colonial troops but also had a large minority of armed Africans and the total number of armed Africans serving with these columns has been estimated at approximately 20,000. The British also utilised the armoured trains to deliver the rapid reaction forces much more quickly to incidents (such as Boer attacks on blockhouses and columns) or to drop them off ahead of retreating Boer columns.
Western Transvaal and the Orange Free State
The Boer commandos in the Western Transvaal were very active after September 1901. Several battles of importance were fought here between September 1901 and March 1902. At Moedwil on 30 September 1901 and again at Driefontein on 24 October, Gen. De la Rey’s forces attacked the British, but were forced to withdraw after the British offered strong resistance.
A time of relative quiet descended thereafter on the western Transvaal. February 1902 saw the next major battle in that region. On 25 February, De la Rey attacked a British column at Ysterspruit near Wolmaransstad. De la Rey succeeded in capturing the column and a large amount of ammunition. The Boer attacks prompted Lord Methuen, the British second-in-command after Lord Kitchener, to move his column from Vryburg to Klerksdorp to deal with De la Rey. On the morning of 7 March 1902, the Boers attacked the rear guard of Methuen’s moving column at Tweebosch. Confusion reigned in British ranks and Methuen was wounded and captured by the Boers. The Boer victories in the west led to stronger action by the British. In the second half of March 1902, large British reinforcements were sent to the Western Transvaal. The opportunity the British were waiting for arose on 11 April 1902 at Rooiwal, where the combined forces of Gens. Grenfell, Kekewich and Von Donop came into contact with the forces of Gen. Kemp. The British soldiers were well positioned on the mountainside and inflicted severe casualties on the Boers charging on horseback over a large distance, beating them back. This was the end of the war in the Western Transvaal and also the last major battle of the war.
While the British occupied Pretoria, the Boer fighters in the Orange Free State had been driven into a fertile area in the north east of the Republic, known as the Brandwater Basin. This offered only temporary sanctuary, as the mountain passes leading to it could be occupied by the British, trapping the Boers. A force under General Hunter set out from Bloemfontein to achieve this in July 1900. The hard core of the Boers under Christiaan de Wet, accompanied by President Steyn, left the basin early. Those remaining fell into confusion and most failed to break out before Hunter trapped them. 4,500 Boers surrendered and much equipment was captured, but as with Robert's drive against Kruger at the same time, these losses were of relatively little consequence, as the hard core of the Boer armies and their most determined and active leaders remained at large.
From the Basin, de Wet headed west. Although hounded by British columns, he succeeded in crossing the Vaal into the Western Transvaal, to allow Steyn to travel to meet the Transvaal leaders. Returning to the Orange Free State, de Wet inspired a series of attacks and raids from the hitherto quiet western part of the country. Many Boers who had earlier returned to their farms, sometimes giving formal parole to the British, took up arms again. In late January 1901, De Wet led a renewed invasion of Cape Colony. This was less successful, because there was no general uprising among the Cape Boers, and de Wet's men were hampered by bad weather and relentlessly pursued by British forces. They narrowly escaped across the Orange River.
From then until the final days of the war, de Wet remained comparatively quiet, partly because the Orange Free State was effectively left desolate by British sweeps. In late 1901, De Wet overran an isolated British detachment at Groenkop, inflicting heavy casualties. This prompted Kitchener to launch the first of the "New Model" drives against him.
The British had first erected lines of blockhouses to protect the railway lines. They now built fresh lines of these, linked by barbed wire fences, to prevent free Boer movement across the veld. They also allowed "New Model" drives. Unlike the earlier inefficient scouring of the countryside by scattered columns, a continuous line of troops could now effectively sweep an area of veld bounded by blockhouse lines. De Wet escaped the first such drive, but lost 300 of his fighters. This was a severe loss, and a portent of further such attrition.
Eastern Transvaal and Cape Colony
Two Boer forces fought in this area; under Botha in the south east and Ben Viljoen in the north east. Botha's forces were particularly active, raiding railways and even mounting a renewed invasion of Natal in September, 1901. After defeating British mounted infantry near Dundee, Botha was forced to withdraw by heavy rains which made movement difficult and crippled his horses. Back in the Transvaal, he attacked a British raiding column at Bakenlaagte. This made his forces the target of increasingly large and ruthless drives by British forces, and eventually, he had to abandon the high veld and retreat to a narrow enclave bordering Swaziland.
To the north, Ben Viljoen grew steadily less active. His forces mounted comparatively few attacks and as a result, the Boer enclave around Lydenburg was largely unmolested. Viljoen was eventually captured.
After he escaped across the Orange in March 1901, de Wet had left forces under Cape rebels Kritzinger and Scheepers to maintain a guerrilla campaign in the Cape Midlands. The campaign here was one of the least chivalrous, with intimidation by both sides of each other's civilian sympathisers. Several captured rebels, including Scheepers, were executed for treason by the British, some in public. In most cases though, the executions were ostensibly for capital crimes such as the murder of prisoners or of unarmed civilians.
Fresh Boer forces under Jan Christiaan Smuts, joined by the surviving rebels under Kritzinger, made another attack on the Cape in September 1901. They suffered severe hardships and were hard pressed by British columns, but eventually rescued themselves by routing some of their pursuers and capturing their equipment.
From then until the end of the war, Smuts increased his forces until they numbered 3,000. However, no general uprising took place, and the situation in the Cape remained stalemated.
Concentration camps (1900 - 1902)
The English term " concentration camp" was first used to describe camps operated by the British in South Africa during this conflict.
The camps had originally been set up by the British Army as " refugee camps" to provide refuge for civilian families who had been forced to abandon their homes for one or other reason related to the war. However, when Kitchener succeeded Roberts as commander-in-chief in South Africa in November 29, 1900, the British Army introduced new tactics in an attempt to break the guerrilla campaign and the influx of civilians grew dramatically as a result. Kitchener initiated plans to
- "flush out guerrillas in a series of systematic drives, organized like a sporting shoot, with success defined in a weekly 'bag' of killed, captured and wounded, and to sweep the country bare of everything that could give sustenance to the guerrillas, including women and children. . . . It was the clearance of civilians - uprooting a whole nation - that would come to dominate the last phase of the war."
As Boer farms were destroyed by the British under their " Scorched Earth" policy - including the systematic destruction of crops and slaughtering of livestock, the burning down of homesteads and farms, and the poisoning of wells and salting of fields - to prevent the Boers from resupplying from a home base many tens of thousands of women and children were forcibly moved into the concentration camps. This was not the first appearance of internment camps. The Spanish had used internment in the Ten Years' War that later led to the Spanish-American War, and the United States had used them to devastate guerrilla forces during the Philippine-American War. But the Boer War concentration camp system was the first time that a whole nation had been systematically targeted, and the first in which some whole regions had been depopulated.
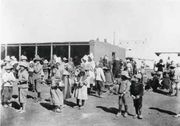
Eventually, there were a total of 45 tented camps built for Boer internees and 64 for black Africans. Of the 28,000 Boer men captured as prisoners of war, 25,630 were sent overseas. The vast majority of Boers remaining in the local camps were women and children. Over 26,000 women and children were to perish in these concentration camps.
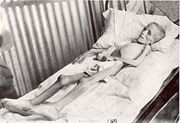
The camps were poorly administered from the outset and became increasingly overcrowded when Kitchener's troops implemented the internment strategy on a vast scale. Conditions were terrible for the health of the internees, mainly due to neglect, poor hygiene, bad sanitation and food shortages. The food rations were meagre, there was a two tier allocation policy whereby wives and children of men who were still fighting were routinely given smaller rations than others. The inadequate shelter, poor diet, inadequate hygiene and overcrowding led to malnutrition and endemic contagious diseases such as measles, typhoid and dysentery to which the children were particularly vulnerable. Coupled with a shortage of medical facilities many of the internees died.
As many Africans became refugees as the war raged across their farms and with the destruction of their homes, they like Boers moved to the towns where the British army hastily created internment camps. Subsequently, the Scorched Earth" policy was ruthlessly applied to both Boers and Africans; although most black Africans were not considered by the British to be hostile, many tens of thousands were also forcibly removed from Boer areas and also placed in concentration camps.
Africans were separately held from Boer internees. Eventually there were a total of 64 tented camps for Africans. Conditions were as bad as in the camps for the Boers, but although after the Fawcett Commission report conditions improved in the Boer camps, "improvements were much slower in coming to the black camps.". It is worth noting that Emily Hobhouse and the Fawcett Commission only ever concerned themselves with the camps that held Boer refugees. No one paid much attention to what was going on in the camps that held African refugees. It is thought that about 12% of all black African inmates died (about 14,154) but the precise number of deaths of Africans in concentration camps is unknown as little attempt was made to keep any records of the 107,000 black Africans who were interned.
Public opinion and political opposition
Although the 1900 UK general election, also known as the "Khaki election", had resulted in a victory for the Conservative government on the back of recent British victories against the Boers, public support quickly waned as it became apparent that the war would not be easy and unease developed following reports about the treatment by the Army of the Boer civilians. Public and political opposition to Government policies in South Africa regarding Boer civilians was first expressed in Parliament in February 1901 in the form of an attack on the policy, the government, and the Army by the radical Liberal MP David Lloyd George.
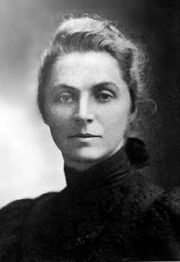
Emily Hobhouse, a delegate of the South African Women and Children's Distress Fund, visited some of the camps in the Orange Free State from January 1901 and in May, 1901 she returned to England on board the ship, the Saxon. Alfred Milner, High Commissioner in South Africa, also boarded the Saxon for holiday in England but, unfortunately for both the camp internees and the British government, had no time for Miss Hobhouse, regarding her as a Boer sympathizer and "trouble maker." On her return, Emily Hobhouse did much to publicize the distress of the camp inmates. She managed to speak to the Liberal Party leader, Henry Campbell-Bannerman who professed to be suitably outraged but was disinclined to press the matter, as his party was split between the imperialists and the pro-Boer factions.
The more radical Liberals however such as David Lloyd George and John Ellis were prepared to raise the matter in Parliament and to harass the government on the issue, which they duly did. St John Brodrick, the Conservative secretary of state for war, first defended the government's policy by arguing that the camps were purely 'voluntary' and that that the interned Boers were "contented and comfortable", but was somewhat undermined as he had no firm statistics to back up his argument so when that position proved untenable, he resorted to the "military necessity" argument and stated that everything possible was being done to ensure satisfactory conditions in the camps.
Hobhouse published a report in June 1901 which contradicted Brodrick's claim, and Lloyd George then openly accused the government of "a policy of extermination" directed against the Boer population. In June 1901, Liberal opposition party leader Campbell-Bannerman took up the assault and answered the rhetorical "When is a war not a war?" with "When it is carried on by methods of barbarism in South Africa," referring to those same camps and the policies that created them. The Hobhouse report caused uproar both domestically and in the international community.
The Fawcett Commission
Although the Government had comfortably won the parliamentary debate by a margin of 252 to 149, it was stung by the criticism and concerned by the escalating public outcry, and called on Kitchener for a detailed report. In response, complete statistical returns from camps were sent in July 1901. By August 1901, it was clear to Government and Opposition alike that Miss Hobhouse's worst fears were being confirmed - 93,940 Boers and 24,457 black Africans were reported to be in "camps of refuge" and the crisis was becoming a catastrophe as the death rates appeared very high, especially amongst the children.
The Government responded to the growing clamour by appointing a commission. The Fawcett Commission as it became known was, uniquely for its time, an all-woman affair headed by Millicent Fawcett who despite being the leader of the women's suffrage movement was a Liberal Unionist and thus a government supporter and considered a safe pair of hands. Between August and December 1901, the Fawcett Commission conducted its own tour of the camps in South Africa. Whilst it is probable that the British Government expected the Commission to produce a report that could be used to fend off criticism, in the end it confirmed everything that Emily Hobhouse had said. Indeed, if anything the Commission's recommendations went even further, the Commission insisted that rations should be increased and that additional nurses be sent out immediately, and included a long list of other practical measures designed to improve conditions in the camp. Millicent Fawcett was quite blunt in expressing her opinion that much of the catastrophe was down to a simple failure to observe elementary rules of hygiene.
Under pressure, the Colonial Secretary Joseph Chamberlain in November 1901 ordered Arthur Milner to ensure that "all possible steps are being taken to reduce the rate of mortality". The civil authority took over the running of the camps from Kitchener and British Command and by February 1902, the annual death-rate in the concentration camps for white inmates dropped to 6.9% and eventually it dropped to 2%, which was a lower rate than pertained in many British cities at the time.
However, by then the damage had been done. A report after the war concluded that 27,927 Boers (of whom 24,074 [50% of the Boer child population] were children under 16) had died of starvation, disease and exposure in the concentration camps. In all, about one in four (25%) of the Boer inmates, mostly children, died.
"Improvements [however] were much slower in coming to the black camps.". It is thought that about 12% of black African inmates died (about 14,154) but the precise number of deaths of black Africans in concentration camps is unknown as little attempt was made to keep any records of the 107,000 black Africans who were interned. It is, however, worth noting that Emily Hobhouse and the Fawcett Commission only ever concerned themselves with the camps that held white Boer refugees. No one paid much attention to what was going on in the camps that held native refugees.
- “The main decisions (or their absence) had been left to the soldiers, to whom the life or death of the 154,000 Boer and African civilians in the camps rated as an abysmally low priority. [It was only] ... ten months after the subject had first been raised in Parliament…[and after public outcry and after the Fawcett Commission that remedial action was taken and] ... the terrible mortality figures were at last declining. In the interval, at least twenty thousand whites and twelve thousand coloured people had died in the concentration camps, the majority from epidemics of measles and typhoid that could have been avoided.”
Kitcheners Policy and the Post-war debate
It has been argued that "this was not a deliberately genocidal policy; rather it was the result of disastrous lack of foresight and rank incompetence on part of the [British] military" . Fergusan also argues that "Kitchener no more desired the deaths of women and children in the camps than of the wounded Dervishes after Omdurman, or of his own soldiers in the typhoid stricken hospitals of Bloemfontein." .
However, to Kitchener and the British Command "the life or death of the 154,000 Boer and African civilians in the camps rated as an abysmally low priority" against military objectives. As the Fawcett Commission was delivering its recommendations, Kitchener wrote to St John Brodrick defending his policy of sweeps, and emphasizing that no new Boer families were being brought in unless they were in danger of starving. This was disingenuous as the countryside had by then been devastated under the "Scorched Earth" policy (the Fawcett Commission in December 1901 in its recommendations commented that: "to turn 100,000 people now being held in the concentration camps out on the veldt to take care of themselves would be cruelty") and now that the New Model counter insurgency tactics were in full swing it made cynical military sense to leave the Boer families in desperate conditions in the countryside.
According to writer S.B. Spies, "at [the Vereeniging negotiations in May 1902] Boer leader Louis Botha stated that he had tried to send [Boer] families to the British, but they had refused to receive them,". Spies quotes a Boer Commandant referring to Boer women and children made refugees by Britain's scorched-earth policy as saying "Our families are in a pitiable condition and the enemy uses those families to force us to surrender." Spies adds, "and there is little doubt that that was indeed the intention of Kitchener when he had issued instructions that no more families were to be brought into the concentration camps." Thomas Pakenham writes of Kichener's policy U-turn, "No doubt the continued 'hullabaloo' at the death-rate in these concentration camps, and Milner's belated agreement to take over their administration, helped changed Kitchener's mind [some time at the end of 1901]. ... By mid-December at any rate, Kitchener was already circulating all column commanders with instructions not to bring in women and children when they cleared the country, but to leave them with the guerrillas... Viewed as a gesture to Liberals, on the eve of the new session of Parliament at Westminster, it was a shrewd political move. It also made excellent military sense, as it greatly handicapped the guerrillas, now that the drives were in full swing. . . . It was effective precisely because, contrary to the Liberals' convictions, it was less humane than bringing them into camps, though this was of no great concern to Kitchener."
The end of the war
Towards the end of the war, British tactics of containment, denial and harassment began to yield results against the guerillas. The sourcing and coordination of intelligence became increasingly efficient with regular reporting from observers in the blockhouses from units patrolling the fences and conducting "sweeper" operations, and from native Africans in rural areas who increasingly supplied intelligence, as the Scorched Earth policy took effect and they found themselves competing with the Boers for food supplies. Kitchener's forces at last began to seriously affect the Boers' fighting strength and freedom of manoeuvre, and made it harder and harder for the Boers and their families to survive.
The British offered terms of peace on various occasions, notably in March 1901, but were rejected by Botha. The last of the Boers surrendered in May 1902 and the war ended with the Treaty of Vereeniging signed on 31 May 1902. Although the British had won, this came at a cost; the Boers were given £3,000,000 for reconstruction and were promised eventual limited self-government granted in 1906 and 1907. The treaty ended the existence of the South African Republic and the Orange Free State as independent Boer republics and placed them within the British Empire. The Union of South Africa was established as a member of the Commonwealth in 1910.
In all, the war had cost around 75,000 lives; 22,000 British soldiers (7,792 battle casualties, the rest through disease), between 6,000 and 7,000 Boer soldiers, and, mainly in the concentration camps, between 20,000 to 28,000 Boer civilians (mainly women and children) and perhaps 20,000 black Africans (both on the battlefield and in the concentration camps). During the conflict, 78 Victoria Crosses (VC) — the highest and most prestigious award in the British armed forces for bravery in the face of the enemy — were awarded to British and Colonial soldiers. See List of Boer War Victoria Cross recipients.
Aftermath and analysis
The Second Boer War cast long shadows over the history of the South African region. The predominantly agrarian society of the former Boer republics was profoundly and fundamentally affected by the scorched earth policy of Roberts and Kitchener. The devastation of both Boer and black African populations in the concentration camps and through war and exile were to have a lasting effect on the demography and quality of life in the region. Many exiles and prisoners unable to return to their farms at all; others attempted to do so but were forced to abandon the farms as unworkable given the damage caused by farm burning and salting of the fields in the course of the scorched earth policy. Destitute Boers and black Africans swelled the ranks of the unskilled urban poor competing with the "uitlanders" on the mines.
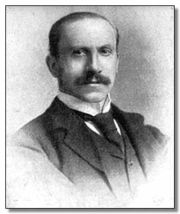
The postwar reconstruction administration was presided over by Lord Milner and his largely Oxford trained Milner's Kindergarten. This small group of civil servants was to have a profound effect on the region, eventually leading to the Union of South Africa. “In the aftermath of the war, an imperial administration freed from accountability to a domestic electorate set about reconstructing an economy that was by then predicated unambiguously on gold. At the same time, British civil servants, municipal officials, and their cultural adjuncts were hard at work in the heartland of the former Boer Republics helping to forge new identities—first as "British South Africans" and then, later still, as white "South Africans." Some scholars, for good reasons, identify these new identities as partly underpinning the act of union that followed in 1910. Although challenged by an Boer rebellion only four years later, they did much to shape South African politics between the two world wars and right up to the present day”.
The counterinsurgency techniques and lessons (the restriction of movement, the containment of space, the targeting of anything and everything that could give sustenance to guerrillas, the relentless harassment through sweeper groups coupled with rapid reaction forces, the sourcing and coordination of intelligence, and the nurturing of native allies) learned during the Boer War were used by the British (and other forces) in future guerrilla campaigns including to counter Malayan communist rebels during the Malayan Emergency.
Many of the Boers referred to the war as the second of the Freedom Wars. The most resistant of Boers wanted to continue the fight and were known as "bittereinders" (or irreconcilables) and at the end of the war a number of Boer fighters such as Deneys Reitz chose exile rather than sign an undertaking that they would abide by the peace terms. Over the following decade, many returned to South Africa and never signed the undertaking. Some, like Reitz, eventually reconciled themselves to the new status quo, but others could not.
Union of South Africa
One of the most important events in the decade after the end of the war was the creation of the Union of South Africa (later the Republic of South Africa). The federation republic was to prove a key ally to Britain and a valuable member of the Dominion of the British Empire during the World Wars. At the start of First World War a crisis ensued when the South African Government led by Louis Botha and other former Boer fighters such as Jan Smuts, declared support for Britain and agreed to send troops to capture and take over the German colony of German South-West Africa (Namibia).
Many Boers were opposed to fighting for Britain, especially against Germany which had been sympathetic to their struggle. A number of bittereinders and their allies took part in a revolt known as the Maritz Rebellion. This was quickly suppressed and in 1916, the leading Boer rebels in the Maritz Rebellion got off lightly (especially compared with the fate of leading Irish rebels of the Easter Rising), with terms of imprisonment of six and seven years and heavy fines. Two years later, they were released from prison, as Louis Botha recognised the value of reconciliation. Thereafter the bittereinders concentrated on political organisation within the constitutional system and built up what later became the National Party which took power in 1948 and dominated the politics of South Africa from the late 1940s until the early 1990s, under the apartheid system.
Effect of the war on domestic British politics
Many Irish nationalists sympathised with the Boers, viewing them to be a people oppressed by British imperialism, much like themselves. Irish miners already in the Transvaal at the start of the war formed the nucleus of two Irish commandos. The Second Irish Brigade was headed up by an Australian of Irish parents, Colonel Arthur Lynch. In addition, small groups of Irish volunteers went to South Africa to fight with the Boers — this despite the fact that there were many Irish troops fighting with the British army. In Britain, the "Pro-Boer" campaign expanded, with writers often idealizing the Boer society.
The war also highlighted the dangers of Britain's policy of non-alignment and deepened her isolation. The 1900 UK general election, also known as the " Khaki election", was called by the Prime Minister, Lord Salisbury, on the back of recent British victories. There was much enthusiasm for the war at this point, resulting in a victory for the Conservative government.
However, public support quickly waned as it became apparent that the war would not be easy and it dragged on, partially contributing to the Conservatives' spectacular defeat in 1906. There was public outrage at the use of scorched earth tactics — the forced clearance of women and children, the destruction of the countryside, burning of Boer homesteads and poisoning of wells, for example — and the conditions in the concentration camps. It also became apparent that there were serious problems with public health in Britain: up to 40% of recruits in Britain were unfit for military service, suffering from medical problems such as rickets and other poverty-related illnesses. This came at a time of increasing concern for the state of the poor in Britain.
Having taken the country into a prolonged war, the electorate delivered a harsh verdict at the first general election after the war was over. Balfour, succeeding his uncle Lord Salisbury in 1903 immediately after the war, took over a Conservative party that had won two successive landslide majorities but led it to a landslide defeat in 1906.
The war and its aftermath reverberated across the Empire. The importing to South Africa and use (especially on the gold mines) of Chinese labour , known as Coolies, after the war by the governor of the new crown colonies, Lord Milner as cheap labour to repress local workers and break strikes, also caused much revulsion in the UK and Australia. The Chinese workers were themselves often kept in appalling conditions, receiving only a small wage and isolated from the local population — revelations of homosexual acts between those forbidden contact with the local population and the services of prostitutes led to further public shock. Some believe the Chinese slavery issue can be seen as the climax of public antipathy with the war.
Empire involvement
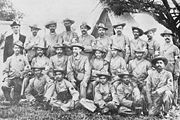
The vast majority of troops fighting for the British Army came from the United Kingdom. However, a large number did come from other parts of the British Empire and later the Commonwealth of Nations. These countries had their own internal disputes over whether they should remain tied to the United Kingdom, or have full independence, which carried over into the debate around the sending of forces to assist the United Kingdom. Though not fully independent on foreign affairs, these countries did have local say over how much support to provide, and the manner in which it would be provided. Ultimately, Canada, Australia, and New Zealand all sent volunteers to aid the United Kingdom. Australia provided the largest number of troops followed by Canada. Troops were also raised to fight with the British from the Cape Colony and the Colony of Natal. Some Boers fighters such as Jan Smuts and Louis Botha were technically British subjects as they came from the Cape Colony and Colony of Natal respectively.
There were also many volunteers from the Empire who were not selected for the official contingents from their countries and travelled privately to South Africa to form private units such as the Canadian Scouts and Doyle’s Australian Scouts. There were also some European volunteer units from India and Ceylon, though the British Government refused offers of non-white troops from the Empire. Some Cape Coloureds also volunteered early in the war, but later some of them were effectively conscripted and kept in segregated units. As a community, they received comparatively little reward for their services. In many ways, the war set the pattern for the Empire's later involvement in the two World Wars. Specially raised units, consisting mainly of volunteers, were dispatched overseas to serve with forces from elsewhere in the British Empire.
Australia
From 1899 to 1901 the six separate self-governing colonies in Australia sent their own contingents to serve in the Boer War. Much of population of the colonies had originated from Great Britain (England, Wales, Ireland) and the desire to support Britain during the conflict appealed to many. After the colonies formed the Commonwealth of Australia in 1901, the new Government of Australia sent "Commonwealth" contingents to the war. The Boer War was thus the first war in which the Commonwealth of Australia fought. However it must also be noted that a few Australians fought on the Boer side. The most famous and colourful character was Colonel Arthur Alfred Lynch, formerly of Ballarat, Victoria, who raised the Second Irish Brigade.
The Australian climate and geography were far closer to that of South Africa than most other parts of the empire, so Australians adapted quickly to the environment, with troops serving mostly among the army's "mounted rifles". Enlistment in all official Australian contingents totalled 16,463. Another five to seven thousand Australians served in "irregular" regiments raised in South Africa. Perhaps five hundred Australian irregulars were killed. In total, 20,000 or more Australians served and about a 1,000 were killed. A total of 267 died from disease, 251 were killed in action or died from wounds sustained in battle. A further 43 men were reported missing.
When the war began some Australians, like some Britons, opposed it. As the war dragged on some Australians became disenchanted, in part because of the sufferings of Boer civilians reported in the press. In an interesting twist (for Australians), when the British missed capturing President Paul Kruger, as he escaped Pretoria during its fall in June 1900, a Melbourne Punch, 21 June 1900, cartoon depicted how the War could be won, using the Kelly Gang.
The convictions and executions of two Australian Lieutenants, Breaker Morant and Peter Handcock in 1902, and the imprisonment of a third, George Witton, had little impact on the Australian public at the time despite later legend. The controversial court-martial saw the three convicted of executing Boer prisoners under their authority. After the war, though, Australians joined an empire-wide campaign that saw Witton released from jail. Much later, some Australians came to see the execution of Morant and Handcock as instances of wrongfully executed British, as illustrated in the 1980 Australian film Breaker Morant.
Canada
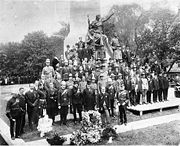
At first, Canadian Prime Minister Wilfrid Laurier tried to keep Canada out of the war. The Canadian government was divided between those, primarily French Canadians, who wished to stay out of the war and others, primarily English Canadians, who wanted to fight. In the end, Laurier compromised by agreeing to support the British by providing only volunteers, equipment and transportation to the war. The United Kingdom would be responsible for paying the troops and returning them to Canada at the end of their service. The Boer War marked the first occasion in which large contingents of Canadian troops served abroad. The 1st Canadian Contingent was composed of 1000 men recruited from the Canadian Militia to form the 2nd (Special Service) Battalion of The Royal Canadian Regiment. This contingent served under the command of the Permanent Force officer William Dillon Otter.
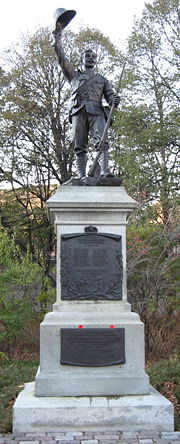
The Battle of Paardeberg in February 1900 represented the second time Canadian Troops saw battle abroad, the first being the Canadian involvement in the Nile Expedition of 1884-85. Canadians also saw action at the Battle of Faber's Put on 30 May 1900. On November 7, 1900, the Royal Canadian Dragoons engaged the Boers in the Battle of Leliefontein, where they saved British guns from capture during a retreat from the banks of the Komati River.
The Canadians had four Victoria Cross recipients in this war: Lieutenant Turner, Lieutenant Cockburn, Sergeant Holland and Arthur Richardson. Ultimately, over 8,600 Canadians volunteered to fight in the South African War. However, not all saw action since many landed in South Africa after the hostilities ended while others (including the 3rd (Special Service) Battalion, The Royal Canadian Regiment) performed garrison duty in Halifax, Nova Scotia so that their British counterparts could join at the front. Later on, contingents of Canadians served with the paramilitary South Africa Constabulary. Approximately 267 Canadians died in the War. 89 men were killed in action, 135 died of disease, and the remainder died of accident or injury. 252 were wounded.
New Zealand
When the Second Boer War seemed imminent, New Zealand offered its support. On 28 September 1899, Prime Minister Richard Seddon asked Parliament to approve the offer to the imperial government of a contingent of mounted rifles thus becoming the first British Colony to send troops to the Boer War. The British position in the dispute with the Transvaal was 'moderate and righteous', he maintained. He stressed the 'crimson tie' of Empire which bound New Zealand to the Mother-country and the importance of a strong British Empire for the colony's security.
By the time peace was concluded two and a half year later, ten contingents of volunteers, totalling nearly 6,500 men from New Zealand, with 8,000 horses had fought in the conflict, along with doctors, nurses, veterinary surgeons and a small number of school teachers. 70 New Zealanders died from enemy action, with another 158 killed accidentally or by disease.
South Africa
During the war, the British army also included substantial contingents from South Africa itself. There were large communities of English-speaking immigrants and settlers in Natal and Cape Colony (especially around Cape Town and Grahamstown), which formed volunteer units which took the field, or local "town guards". At one stage of the war, a "Colonial Division", consisting of five light horse and infantry units under Brigadier General Edward Brabant, took part in the invasion of the Orange Free State. Part of it withstood a siege by Christiaan De Wet at Wepener on the borders of Basutoland. Another large source of volunteers was the uitlander community, many of whom hastily left Johannesburg in the days immediately preceding the war.
Later during the war, Lord Kitchener attempted to form a Boer Police Force, as part of his efforts to pacify the occupied areas and effect a reconciliation with the Boer community. The members of this force were despised as traitors by the Boers still in the field. Those Boers who attempted to remain neutral after giving their parole to British forces were derided as "hansoppers" (hands-uppers) and were often coerced into giving support to the Boer guerillas. (This was one of the reasons for the British ruthlessly scouring the countryside of people, livestock and anything else which the Boer commandos might find useful.)
Like the Canadian and particularly the Australian and New Zealand contingents, many of the volunteer units formed by South Africans were " light horse" or mounted infantry, well suited to the countryside and manner of warfare. Some regular British officers scorned their comparative lack of formal discipline, but the light horse units were hardier and more suited to the demands of campaigning than the overloaded British cavalry, who were still obsessed with the charge with lance or sabre. At their peak, 24,000 South Africans (including volunteers from the Empire) served in the field in various "Colonial" units. Notable units (in addition to the Imperial Light Horse) were the South African Light Horse, Rimington's "Tigers", Kitchener's Horse and the Imperial Light Infantry.
